

Top DIY Plumbing Tricks and Tips for Every Homeowner
There’s no doubt common plumbing problems need to be fixed sooner rather than later. Even small leaks can turn into major water damage, and water damage can do more than just leave puddles in an unfinished basement. Thankfully, there are several easy fixes a homeowner can do themselves before they call a 24-hour plumber.
The best prep work a home plumber can do is the research needed to understand how all the pieces and parts work together to make a unit. Your toilet, faucets, and bathtub drain are all a part of the primary water line. When something goes wrong, it helps to have a general sense of the bigger picture before you get your tools out.
An Ounce of Prevention
Sometimes, the best plumbing DIY projects are the ones you complete before you notice anything is wrong. Washing machine hoses, for example,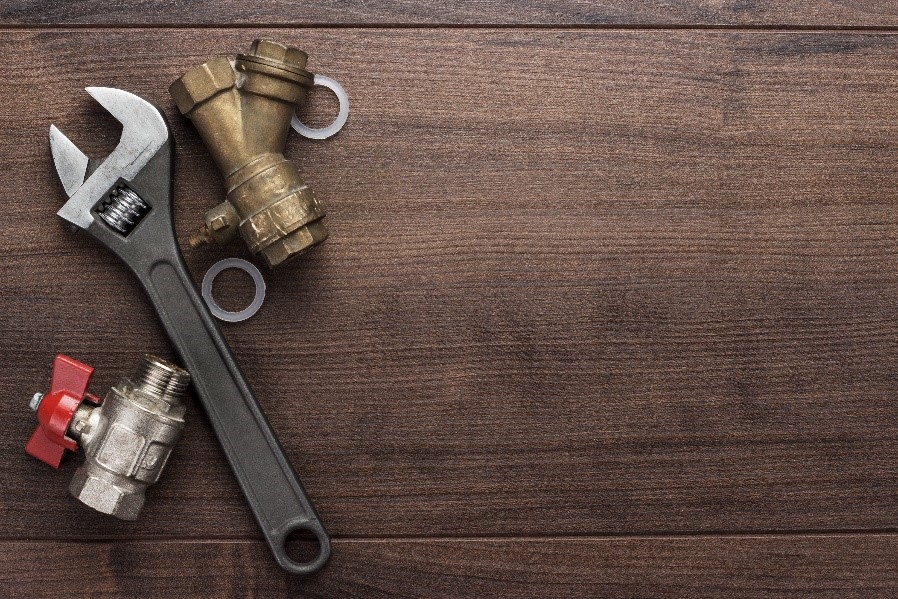 need to be replaced every three to five years or so, but they’re often forgotten about until they start to leak. Check for cracking or frayed hoses on a regular basis and replace as needed. You can also inspect the pipes under the sink and the walls around your appliances for any signs of leaking. Mold is notoriously difficult to eliminate, and tiny leaks that go undiagnosed can add up to thousands in clean-up costs.
You should also insulate your pipes during the cold weather. If your pipes come into contact with the exterior of the home, then there’s a good chance they will freeze. By insulating the entire space, you ensure you’ll still have running water even when the temperatures start to fall. If the pipe goes through the cement foundation, you may need a frost-free hose bib. Bibs can be installed closer to the interior of your home, so there’s less chance of icy trouble should you need to turn the water off.
You’ll also want to know where the main sewer clean-out line is, which is the pipe that connects to the main sewer line. If there’s a blockage or you just want to do normal maintenance on your sewer, then check either the property around the house or the basement. The clean-out line will be marked with a cap that is either steel-threaded or plastic. Plastic caps generally come in one of three colors: black, white or green.
Gathering Your Tools
All homeowners should have a bucket to catch leaks, a plunger to unclog a stopped drain, and a variety of wrenches (including Allen keys) in different sizes. Multi-bit screwdrivers also come in handy and make for less crowded tool boxes. Blind caps help you work on valves that are set far back into the wall. Duct tape, leak sealing tape, or Teflon tape can provide a great temporary fix for leaks, and strong glues like epoxy may even provide a more permanent solution to leaks.
Turning Off the Water
If you’re not sure where the leak is coming from, you’ll want to turn off all the water lines so there’s no further leaking. Your main shutoff valve is normally located near the water meter, which is generally underground or potentially on the side of the house. (You may have to call your utility company to find the meter.) Remove the cover from the meter and turn the valve 90° clockwise with a cutoff key or adjustable wrench. If you have a secondary valve, it should be in the basement.
If you do know where the leak is located, then you can turn off the primary valve by turning it clockwise. Typically, you can easily find the valve under the sink if it’s a broken faucet repair, but a shower or bathtub faucet repair may be much harder. A bathtub installation may or may not have a shutoff valve, and if it does have a valve, it may only be accessible through the wall. Instead of ripping out your tiles, you should turn off the main water line. If you can find the secondary shutoff valve for the shower though, the leak is likely caused by a bad gasket or washer (both easy and inexpensive repairs.) Once you shut off the water, just take out the handles, check the stem, and then replace the part.
Hot Water Heater Maintenance and Repairs
Whether it’s making odd sounds or you just won’t be using it for the next two months, you need to know how your water heater works. First, ensure the pitch (slope) is toward the steam, so you know the water is draining correctly. If the water heater is leaking, it could also be because the liner has worn away. (Many heaters have extended warranties, so you may want to see if yours is still covered.) Gas water heaters have a supply knob that has an on/off switch, while electric heaters have a circuit breaker that needs to be flipped off. Electric heaters may also need the fuses removed first. Once that’s done, you can turn the cold water supply off by turning the shutoff valve clockwise.
Sink or Toilet Clogs
A slow-moving drain may not seem like something that needs immediate attention, but the longer you wait, the worse it will be. If it seems like your  drain or bathroom plumbing is under more pressure than usual or they’re clearly blocked, you may need to try a few solutions before you find the right one.
The first thing to do is start with some gloves and your hand to clear the blockage (e.g., your child’s toy). Common chemical draining products (e.g., Drano) should be used as a last resort because the chemicals can damage the pipes. If your hand doesn’t work, a plunger is typically the next step. For sinks and toilets, use plungers to rid the drain of a variety of particles. If you think it’s a grease or hair clog though, then skip the plunger. You may just push the blockage deeper into the drain. For hair or grease clogs, use drain-cleaning tools that can be found at your hardware store (e.g., Zip It.) If this doesn’t work, you may need to check the trap and use a bottle brush to work through the material (ensure you clean the drain well with soap and water after completing).
In the worst cases, you’ll need to use an auger, which is a snaking tool that can reach into your drain to clear it out. This is particularly good for toilets that have a major blockage. Augers have a handle that you can crank to reach and remove the clog. If you don’t have an auger, you may be able to unbend a wire coat hanger, but use carefully because it may scratch the enamel on your toilet.
Replacing a Washing Machine Hose
To replace a washing machine hose, you’ll need to unplug the machine, turn off the water, and then disconnect the hose from the back of the machine. Make sure you have a bucket handy as water will leak out. Connect the new hose to the right valve, and then turn the water back on.
Fixing a Leak with Epoxy
Smaller leaks may be able to be fixed with strong glue or a repair clamp. Once you know where the leak is, turn off the water and dry the pipe off. Put the epoxy together by kneading the parts into one, and then place it around the pipe. Once the glue has set, just turn the water back on, and check for further leakage.
For a repair clamp, you’ll need to loosen the screws on the clamp, place it around the pipe, and then tighten up the screws again. The rubber gasket needs to be against the leak for best results.
Fixing a Running Toilet
If the toilet is running, it’s likely a fixable problem with the tank. Do not continue to flush either a clogged or running toilet. Either the water is too high or the flapper that sits between the tank and the toilet bowl has worn out. Remove the lid so that you can lower the tank’s float. This is usually done by turning the adjustment screw or by sliding the rod. Adjust the float until the water level is below the overflow tube, and then test by flushing.
If the water level is below the top of the tube, then it’s likely you need a new flapper. These are easily found at any hardware store.
- Turn the shutoff valve off, which will be located below the toilet tank.
- Remove the rubber flapper located at the bottom of the tank.
- Remove the chain from the rod.
- Dry off the drain.
- Install the new flapper and chain.
- Check the toilet, and adjust valve chain as needed for easier flushing.
Fixing a Leaky Faucet
Because faucets are a mechanical fixture, eventually they will start to leak. Use the following guide to fix a dripping faucet, so you can stop wasting water, and silence that infernal dripping noise at the same time. Below you’ll find the fixes to the most likely culprits.
Replacing a Washer
Rubber washers regulate the pressure of your water and are found on compression-style (older) faucets.
- Turn off the shutoff valve to the faucet.
- Remove the cap on the faucet handle.
- Find the screw under the handle and remove.
- Take the handle off to gain access to the valve.
- Remove the valve with a deep socket wrench.
- Find the screw holding the washer in place to the valve and remove.
- Replace washer and use Teflon tape on the threads of the valve.
- Screw the valve back in, and tighten (don’t over tighten).
- Replace the handle and cover.
- Turn water back on and check for leaks.
Repairing the Valves on Cartridge of Ball Faucets
The newer faucets may be less likely to leak, but they’re also more difficult to fix. If you have a leaking cartridge faucet, you’ll normally need to replace the entire cartridge. This involves taking off the cap and the handle before getting to the valve. Depending on your faucet, this can become rather complicated, rather quickly.
There are lots of parts in a ball faucet, which can make replacing just one impractical for novice plumbers. The good news is that you can buy repair kits for ball faucets that give detailed instructions for fixing the leak.
When to Call a 24 Hour Plumber
Unfortunately, there are times when you won’t be able to fix the problem on your own without endangering your pipes and plumbing. The best time to call a plumber is when you think you may do more harm than good to your plumbing or pipes. Fortunately, you can find a 24 hour plumbing service to find an expert. Christianson Air Conditioning & Plumbing has the skills to not only spot the underlying problem but also to see the spider effect of damage it may have caused to the other parts of your home (e.g., inside the walls, under the floors, etc.). The faster a plumber can diagnose the problem and repair it, the safer your home will be.
Sorry, comments for this entry are closed at this time.