Plumbing Emergency Tips Every Homeowner Should Know

Woman having a under the sink plumbing emergency

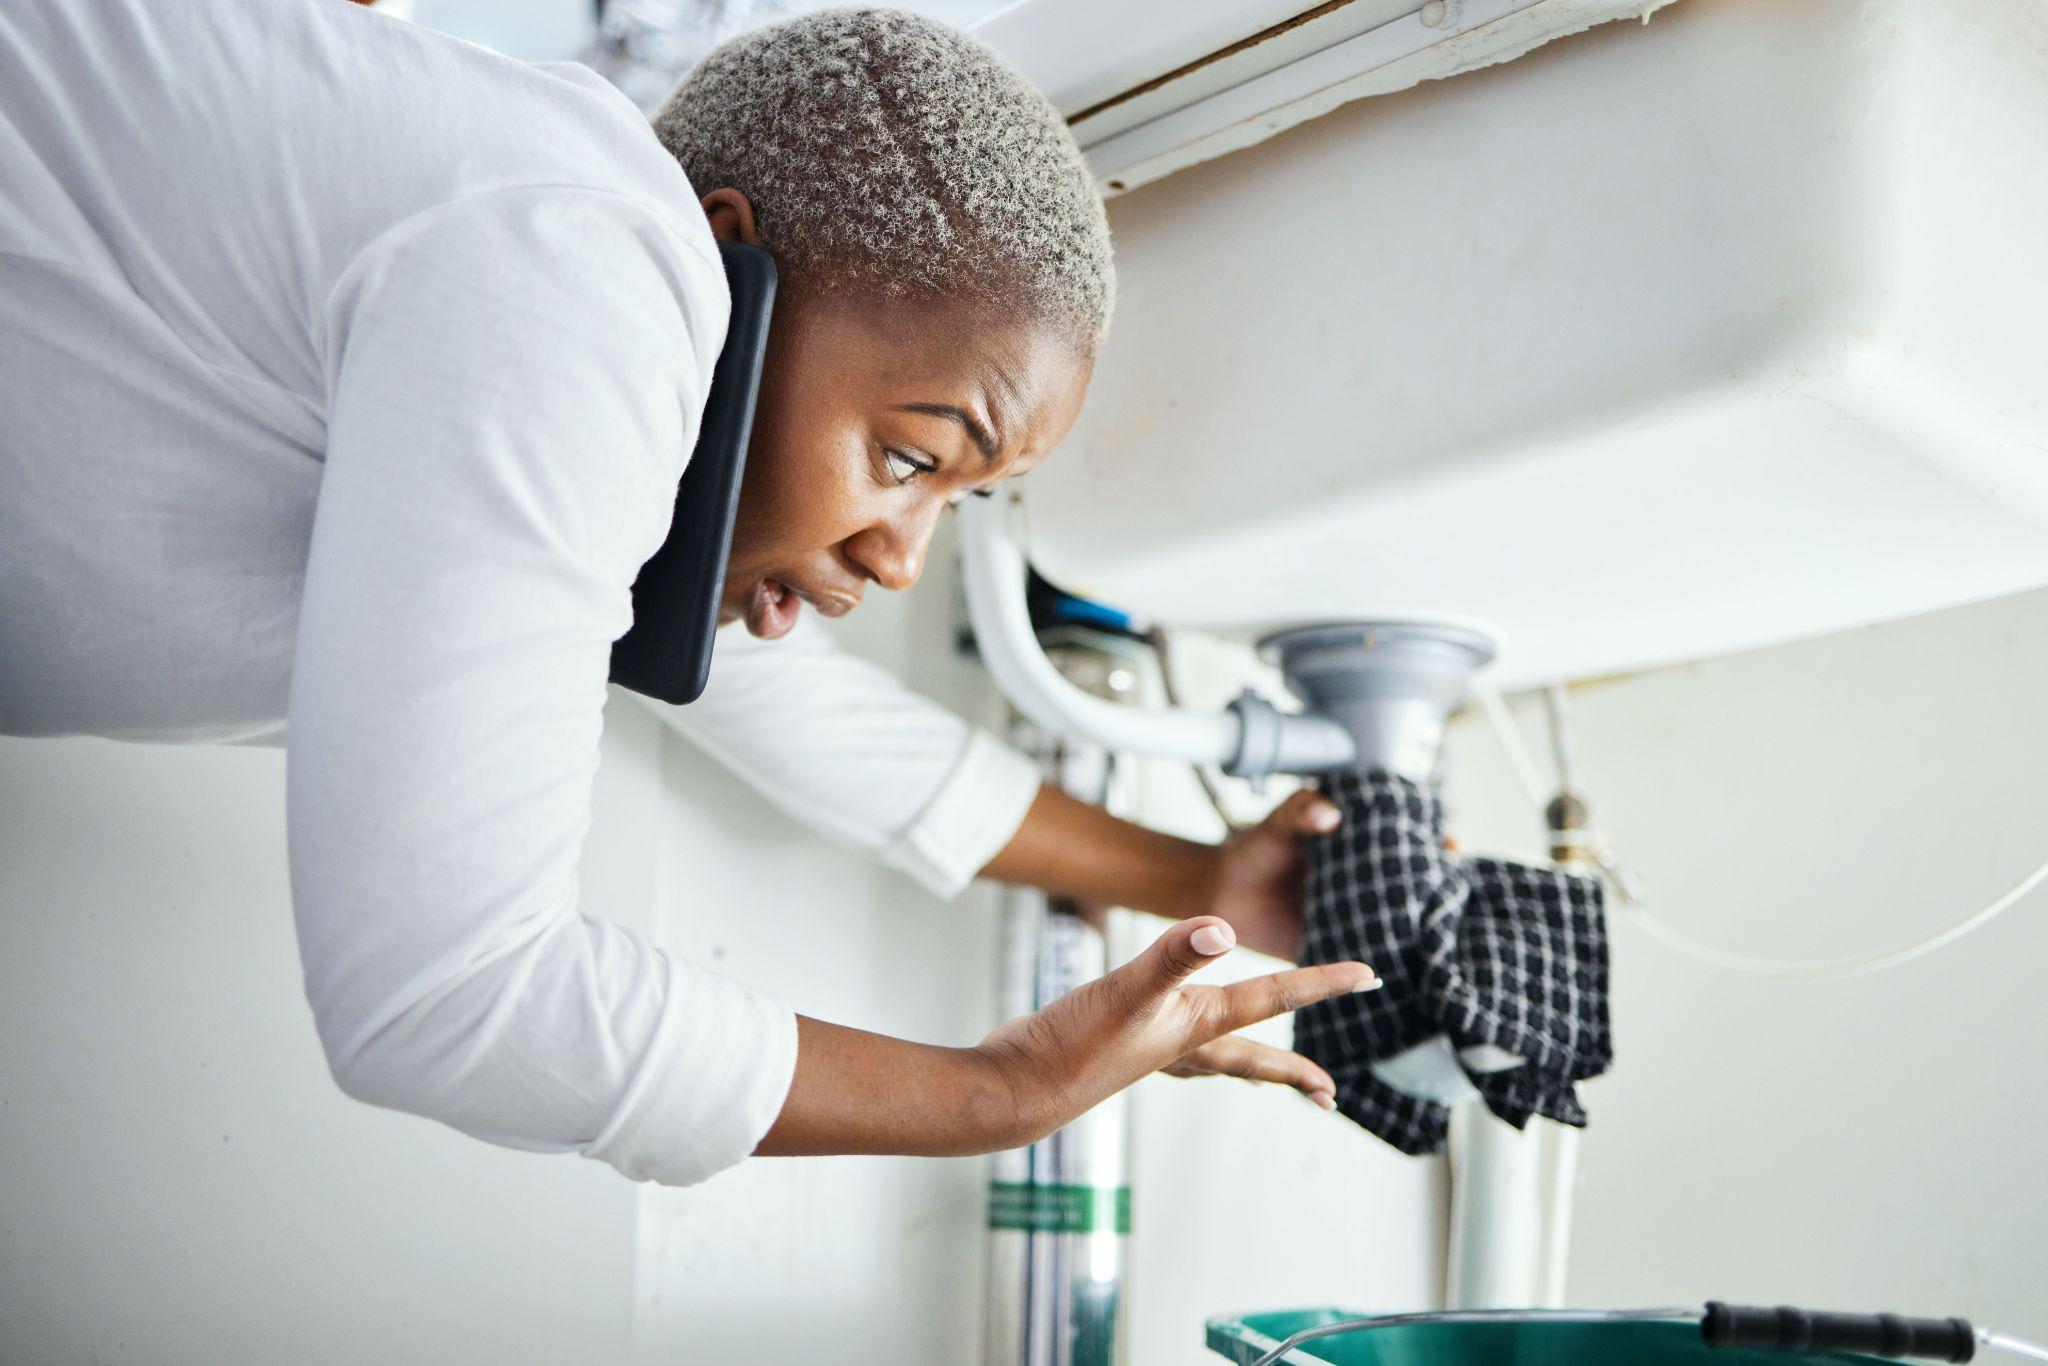
Plumbing emergencies don’t wait for a convenient time. A burst pipe, leaking water heater, or overflowing toilet can happen with no warning—and without the right response, they can cause extensive damage to your home. As a homeowner, it’s essential to know how to handle these situations effectively until a licensed emergency plumber arrives.

This guide offers practical, professional advice on how to respond to the most common plumbing emergencies. Whether you’re a seasoned property owner or looking for plumbing tips for new homeowners, the information below can help you act fast, prevent further damage, and protect your home and family.

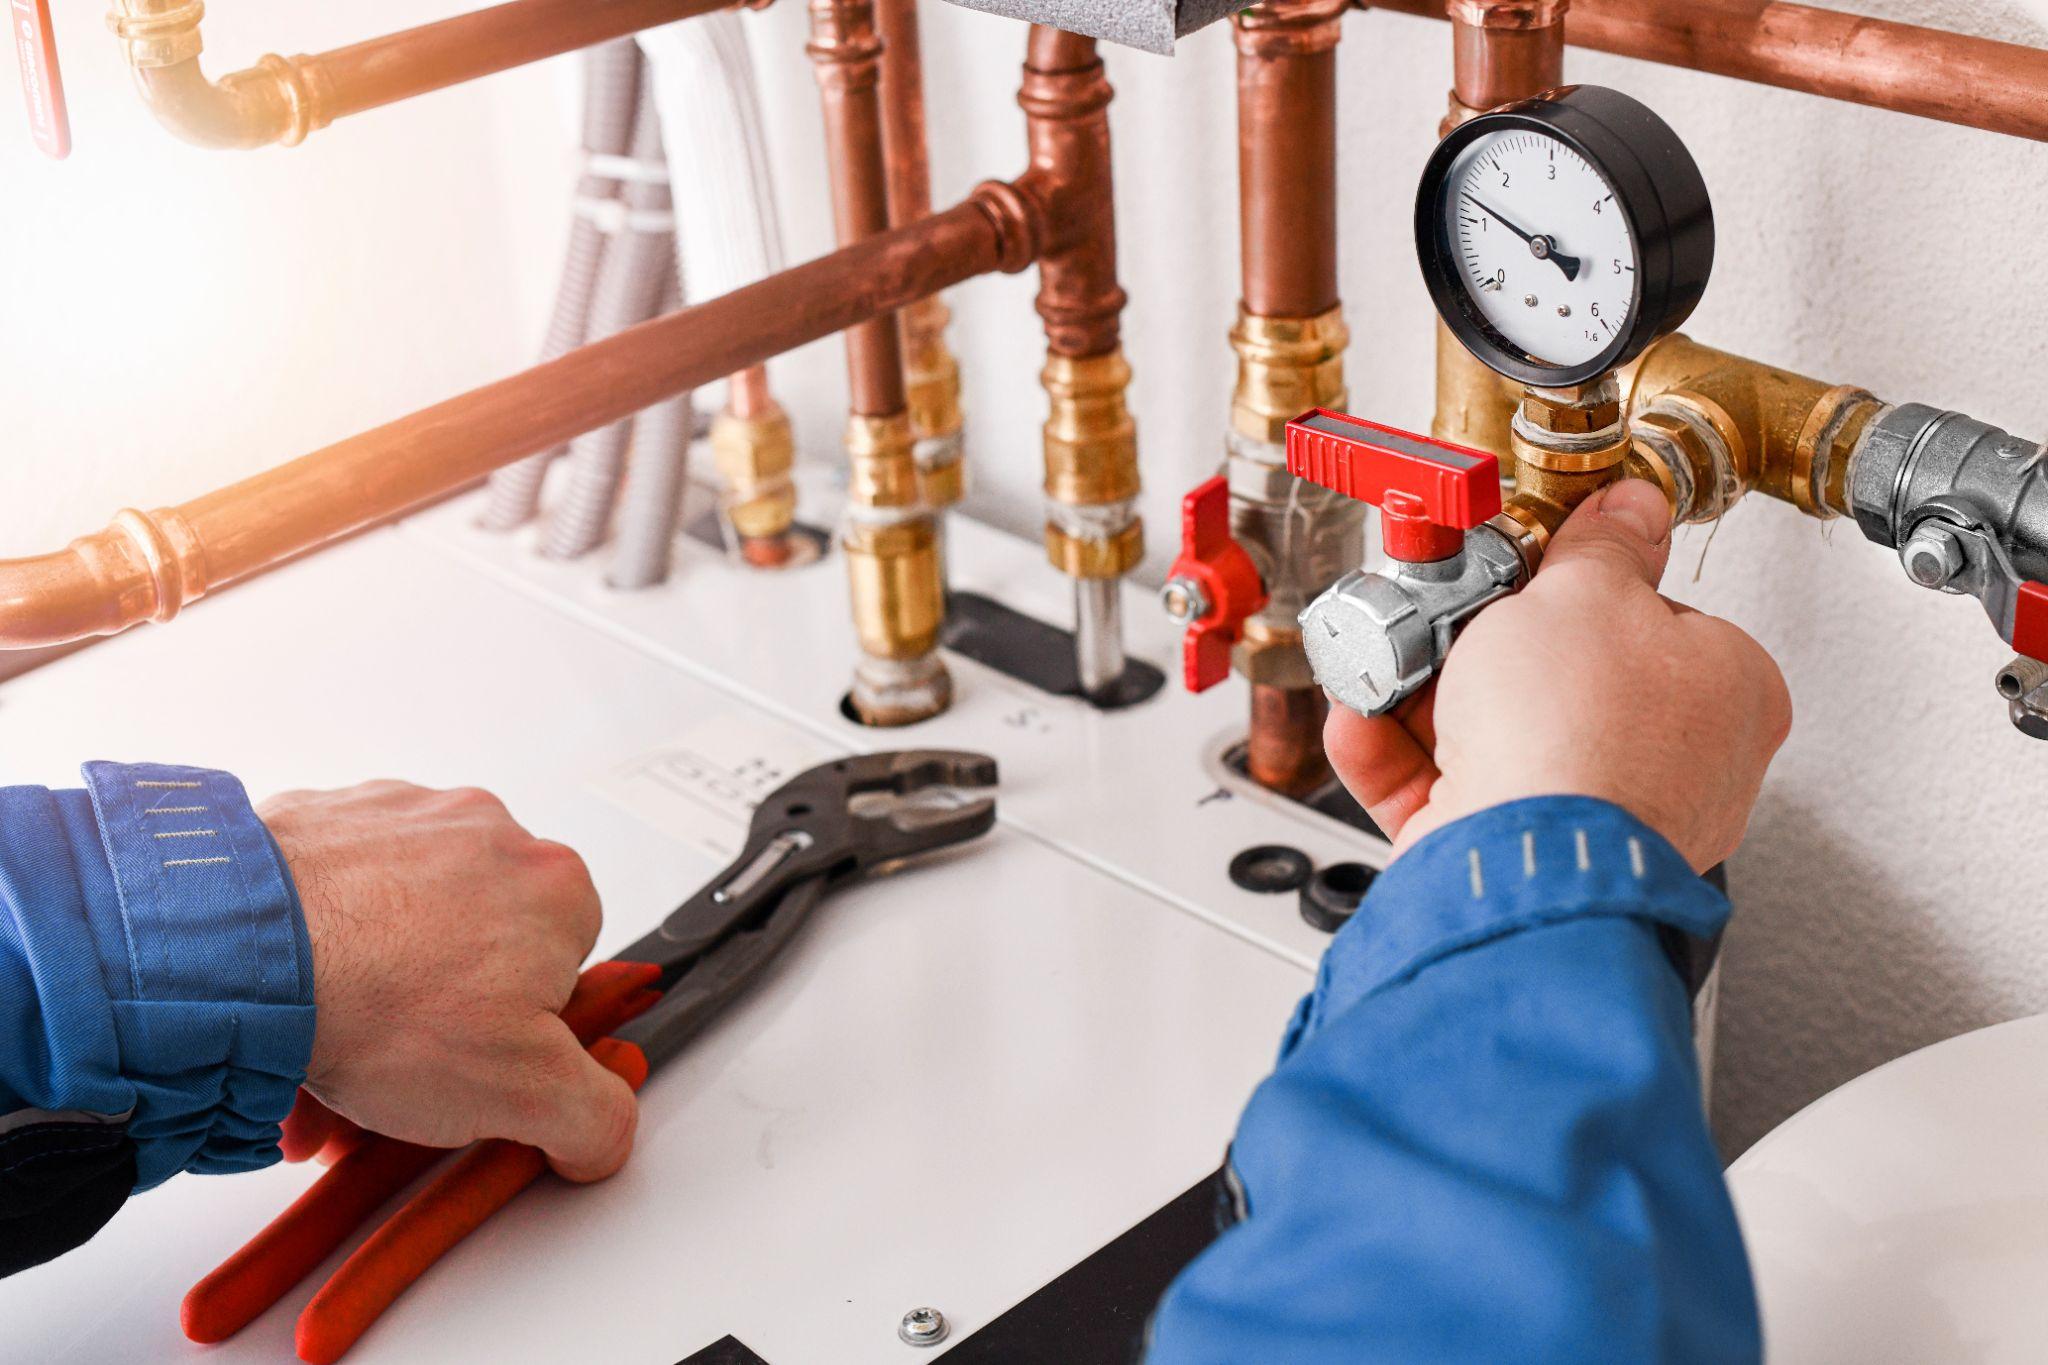
Know Where Your Shutoff Valves Are

Before any emergency occurs, locate and label the following:

  • Main water shutoff valve: Often found near where the water line enters your home.
  • Local shutoff valves: Under sinks, behind toilets, and near water-based appliances.
  • Electrical breaker panel: Critical for shutting off power to water heaters or other appliances near leaks.

In an emergency, being able to shut off water and power quickly can significantly reduce damage and risk.

Common Plumbing Emergencies and How to Respond

Professional plumber investigating a plumbing emergency

Plumbing emergencies vary in severity, but most require immediate action. Here’s how to manage the most common situations until help arrives.

Broken Water Pipes

If a pipe bursts due to freezing temperatures, corrosion, or damage:

  • Shut off the main water valve right away.
  • Open all faucets to drain the system and reduce pressure.
  • Shut off electrical breakers to affected appliances, such as water heaters.
  • Remove any standing water to prevent floor and wall damage.
  • Contact a licensed emergency plumber to locate the break, assess the extent of the damage, and make permanent pipe repairs.

Leaking Pipes

Leaks are often less obvious than bursts but can be just as destructive over time.

  • If the leak’s location is clear (e.g., under a sink), shut off the local valve.
  • If it’s hidden or severe, shut off the main water valve.
  • Unplug nearby electronics, and clean up any pooling water.
  • Contact an emergency plumber to assess and repair the leak.

Leaking Toilets

Toilet leaks can stem from the tank, the base, or the supply line.

  • Turn off the shutoff valve located behind the toilet.
  • Flush to empty the tank and bowl.
  • Use towels or buckets to absorb any remaining leakage.
  • Call a professional if the problem persists or you suspect damage to subflooring.

Leaking Faucets

Dripping faucets might seem minor, but they can lead to long-term damage and higher water bills.

  • Shut off the local valve beneath the sink or behind the wall access panel.
  • Open the faucet to release pressure.
  • Clean any moisture under sinks or inside cabinets.
  • Persistent dripping may indicate a valve or cartridge issue—professional inspection is recommended.

Leaking Water Heater

Leaks around a water heater are serious due to the risk of electrical shock or tank failure.

  • Shut off the cold water supply to the heater.
  • Switch off the breaker (or gas valve) to stop power to the unit.
  • Open hot and cold faucets to reduce pressure.
  • Most heaters have a drain pan—check that it’s draining properly.
  • Call an emergency plumbing service to inspect and repair the water heater.

Clogged Toilets and Sinks

Overflowing water from a clogged toilet

Clogs can lead to backups and water overflows if not handled correctly.

  • Don’t flush again or add more water.
  • Use the appropriate plunger: flange for toilets, cup-style for sinks.
  • Avoid chemical drain cleaners, especially with older pipes.
  • If water won’t drain or backs up repeatedly, call for emergency plumbing repair.

When Should You Call an Emergency Plumber?

Not all plumbing problems require immediate professional help—but knowing when to call can prevent a small issue from becoming a costly disaster. Here are signs it’s time to call an emergency plumber:

  • Water is actively leaking or flooding in your home.
  • You can’t shut off the water using local or main valves.
  • A sewage smell or backup is present.
  • There’s no running water or no hot water.
  • Water is dripping from the ceiling or walls, indicating a hidden leak.
  • A fixture or appliance is leaking near electrical wiring.
  • You’ve tried to fix the problem, and it’s not getting better—or it’s getting worse.

If you’re ever unsure, it’s better to make the call. A licensed plumber can assess whether the issue is urgent or if it can wait until regular hours.

Plumbing Tips for New Homeowners

Buying your first home? Here are a few preventive plumbing tips for homeowners:

  • Get a plumbing inspection within the first 6 months.
  • Locate and label all shutoff valves.
  • Keep a basic plumbing toolkit: plunger, wrench, plumber’s tape, and flashlight.
  • Learn early signs of trouble: slow drains, moisture under sinks, or running toilets.
  • Never ignore small leaks—they tend to become big problems.

FAQs

What qualifies as a plumbing emergency?

Any issue that causes immediate water damage, shuts off water access, or creates a safety hazard—such as a burst pipe, sewage backup, or a major leak.

Should I shut off the water or power first?

Always shut off the water first to stop the flow. If there’s water near electrical outlets or appliances, turn off the power at the breaker box next.

Are slow leaks an emergency?

Not always, but they can cause long-term damage. If you can’t identify the source or stop the leak, call a professional for an assessment.

Can I fix a leak myself?

Small leaks at connections may be fixable with tools and tape. But leaks inside walls, under flooring, or near appliances should be handled by a licensed emergency plumber service.

Need Help Now? Call the Emergency Plumbing Experts

Professional emergency plumber from Christianson Air Conditioning and Plumbing

Some plumbing issues can wait. Others can’t. If you’re facing water damage, can’t locate a leak, or are worried about safety, don’t wait until the damage gets worse.

Christianson Air Conditioning & Plumbing offers 24/7 emergency plumbing services in Austin, San Antonio, New Braunfels, and Temple. Our licensed team responds quickly and professionally, whether it’s day or night, weekday or weekend.

Call now to speak with an experienced emergency plumber—we’re ready when you need us most.

Seasonal Sprinkler System Preparation: Tips for a Smooth Transition

A properly maintained sprinkler system is essential for keeping your lawn lush and healthy while preventing unnecessary water waste and costly repairs. Whether you’re gearing up for warm weather or preparing for the winter months, following the right sprinkler tips will help you avoid common issues and extend the life of your system.

Why Seasonal Sprinkler System Maintenance Matters

Your all-season sprinkler system requires different care throughout the year. In the spring and summer, proper setup ensures efficient watering and prevents leaks or malfunctions. When colder months approach, winterizing your system protects it from freezing temperatures that could cause serious damage. By following the right sprinkler system maintenance steps, you can ensure your system runs smoothly year-round.

Steps to Turn on Your Sprinkler System for Spring and Summer

When the temperatures start to rise, knowing the correct steps to turn on your sprinkler system is crucial. Before running your summer sprinklers, check for leaks, clean and adjust sprinkler heads, test water pressure, and program your timer settings. Taking these proactive steps helps optimize performance and reduce water waste.

How to Prep Your Sprinkler System for Winter

As fall approaches, it’s important to know how to prep your sprinkler system for winter. Turning off the water supply, draining the system, insulating exposed pipes, and shutting down the controller will help prevent frozen pipes and costly repairs. Winterizing your sprinkler system ensures it remains in good condition for the next watering season.

Get Expert Help with Sprinkler System Maintenance

Regular sprinkler system maintenance keeps your lawn healthy and your system functioning efficiently. If you need assistance with summer sprinkler repair or winterization, Christianson Air Conditioning & Plumbing is here to help. Explore the infographic below for essential seasonal sprinkler tips, and contact us today to schedule a professional inspection.

Seasonal Sprinkler System Preparation Infographic

PEX Piping vs Copper: The Key Differences to Consider

Copper piping and PEX piping

When it comes to plumbing, one of the most common debates homeowners and contractors face is PEX vs copper plumbing. Both materials are widely used in residential and commercial plumbing systems, but each comes with its own set of advantages and drawbacks.

If you are trying to decide which material to go with, questions may be coming to mind, such as “Should I use copper or PEX?” or “Is PEX better than copper?” Below, we will help break down the key differences so you can make an informed decision for your plumbing system.

What Is PEX Piping?

PEX (cross-linked polyethylene) is a flexible, durable plastic piping that has gained popularity in plumbing applications over the last few decades. It is commonly used for water supply lines and radiant heating systems. PEX piping is available in different colors—red for hot water, blue for cold water, and white for general use—making it easy to identify in a system.

What Is Copper Piping?

Copper piping has been a standard in plumbing for more than a century. It is a metal pipe that is naturally resistant to corrosion, highly durable, and capable of withstanding high temperatures and pressure. Copper pipes come in different types, including Type M (thin-walled), Type L (medium-walled), and Type K (thick-walled), each used for different applications.

PEX vs Copper Piping: Key Differences

1. Installation & Ease of Use

PEX:

  • Easy to install, requiring fewer fittings and able to bend around corners
  • Lightweight and flexible, making it easier to work with in tight spaces
  • Can be connected using push-to-connect fittings or crimping methods, requiring minimal tools

Copper:

  • More labor-intensive, requiring precise cutting, soldering, and fittings
  • Heavier and rigid, making installation more challenging in tight spaces
  • Requires the use of a torch for soldering, which can be a fire hazard

Verdict: PEX is the easier and faster option to install, making it a preferred choice for DIYers and professionals alike.

2. Durability & Longevity

Testing the durability of copper pipes

PEX:

  • Resistant to corrosion and mineral buildup
  • Does not burst when frozen, as it can expand and contract
  • More susceptible to UV degradation, meaning it cannot be used outdoors
  • Can be punctured more easily compared to copper

Copper:

  • Extremely durable and can last for 50+ years
  • Resists UV light, making it suitable for outdoor applications
  • Naturally antimicrobial, preventing bacterial growth inside pipes
  • Can corrode over time, especially in areas with acidic or high-mineral-content water

Verdict: While both materials are long-lasting, copper has a longer track record of durability.

3. Cost Comparison

PEX:

  • Generally cheaper than copper
  • Lower labor costs due to easier installation

Copper:

  • More expensive due to fluctuating copper prices
  • Higher labor costs due to complex installation

Verdict: PEX is the more cost-effective choice for most homeowners.

4. Water Quality & Health Concerns

PEX:

  • Safe for potable (drinking) water use, but some concerns exist about chemical leaching
  • Cannot be used in high-temperature water systems above 200°F
  • Some PEX materials can absorb odors or flavors from water

Copper:

  • Naturally antimicrobial, reducing bacterial growth
  • Does not leach chemicals into water
  • May release small amounts of copper into the water, which can be a concern in areas with acidic water

Verdict: Copper is generally preferred for those concerned about long-term water quality.

5. Freeze Resistance

PEX:

  • More resistant to freezing due to its ability to expand and contract
  • Less likely to burst in freezing temperatures

Copper:

  • More likely to burst when frozen, leading to costly repairs

Verdict: PEX is the better option for cold climates due to its flexibility.

6. Environmental Impact

PEX:

  • Made from petroleum-based plastic, which is not as environmentally friendly
  • Difficult to recycle compared to copper

Copper:

  • 100 percent recyclable and reusable
  • More environmentally sustainable

Verdict: Copper is the more eco-friendly choice due to its recyclability.

Pros and Cons of PEX Plumbing

Plumber holding PEX piping

Pros:

  • Easier and faster installation
  • Lower material and labor costs
  • Resistant to corrosion and mineral buildup
  • Expands in freezing temperatures, reducing burst risks

Cons:

  • Not UV-resistant and cannot be used outdoors
  • Potential for chemical leaching into water
  • Less durable against physical damage and can be punctured easily

Pros and Cons of Copper Plumbing

Pros:

  • Long-lasting and durable for 50+ years
  • Resistant to UV exposure and suitable for outdoor use
  • Antimicrobial properties improve water quality
  • Fully recyclable and environmentally friendly

Cons:

  • More expensive than PEX
  • Labor-intensive installation process
  • Susceptible to corrosion in acidic water conditions
  • Can burst when frozen

PEX vs Copper: Which Should You Choose?

Happy client shaking hands with a plumber

The best choice depends on your specific needs.

Choose PEX if you want a budget-friendly, easy-to-install, and freeze-resistant solution for your home’s plumbing. Choose copper if you prefer a long-lasting, environmentally friendly, and naturally antimicrobial material that works well outdoors.

Both PEX and copper plumbing options have their strengths and weaknesses. If you’re still unsure, consulting a professional plumber can help you determine the best choice for your home’s plumbing needs.

Contact Christianson Air Conditioning & Plumbing for Expert Plumbing Services

Choosing PEX vs copper plumbing can be a challenging decision, but you don’t have to make it alone. At Christianson Air Conditioning & Plumbing, our experienced team is here to help you determine the best solution for your home or business. Whether you need PEX or copper pipe installation, or repairs, we provide reliable, high-quality plumbing services across Central Texas.

Contact us today to schedule a consultation or request a service appointment.

Everything You Need to Know About Low Flow Faucets

Low Flow faucet

Water conservation is becoming an essential part of modern homeownership, and one of the easiest ways to reduce water usage is by upgrading to low flow faucets. Whether you’re looking to lower your water bills, improve sustainability, or comply with building codes, low flow plumbing fixtures can make a significant difference.

Below, we’ll cover what a low flow faucet is, how it works, and the benefits of making the switch.

What Is a Low Flow Faucet?

A low flow faucet is designed to reduce the amount of water used without compromising performance. Standard faucets typically have a faucet flow rate of around 2.2 gallons per minute (GPM), while a low flow bathroom faucet has a maximum flow rate of 1.5 GPM or less.

These faucets achieve efficiency through aerators and pressure compensation technology, which help maintain strong water pressure while using less water. By installing low flow fixtures, homeowners can significantly reduce water consumption without sacrificing functionality.

How Do Low Flow Plumbing Fixtures Work?

Low flow plumbing fixtures use several techniques to cut down on water usage while maintaining effective flow.

  • Aerators – These small devices mix air with water to maintain water pressure while using less volume.
  • Flow Restrictors – Limit the amount of water that passes through the faucet, ensuring efficiency.
  • Laminar Flow Technology – Provides a steady stream of water, reducing splashing and improving efficiency.
  • Pressure-Compensating Valves – Adjust water pressure dynamically to ensure a consistent and comfortable flow.

By incorporating these technologies, water saving faucets can cut down on waste and promote sustainability without negatively impacting daily tasks like washing hands, brushing teeth, or washing dishes.

Benefits of Low Flow Faucets

Benefits of low flow faucets

Switching to low flow fixtures offers numerous advantages for homeowners, businesses, and the environment.

1. Water Conservation

The primary benefit of installing a low flow bathroom faucet or kitchen faucet is the significant reduction in water usage. Traditional faucets can waste thousands of gallons of water annually, whereas low flow plumbing fixtures can reduce water consumption by 30-50%.

2. Lower Water Bills

Reducing water usage naturally leads to lower utility costs. Since a low flow faucet uses less water, homeowners and businesses can expect to see a decrease in monthly water bills, making it a cost-effective upgrade over time.

3. Energy Savings

Using less hot water means your water heater doesn’t have to work as hard, leading to energy savings. By installing these faucets, you can reduce the amount of energy used to heat water, lowering electricity or gas expenses.

4. Environmental Impact

Water conservation helps protect natural resources. By reducing water waste, low flow plumbing fixtures contribute to sustainability efforts and help reduce the strain on municipal water supplies.

5. Compliance with Regulations

Many states and municipalities have water conservation laws that require new construction and remodeling projects to include low flow fixtures. Installing low flow bathroom faucets and kitchen faucets can help ensure compliance with these regulations.

How to Choose the Right Low Flow Faucet

When selecting a low flow faucet, consider the following factors:

  • Flow Rate – Look for fixtures with a flow rate of 1.5 GPM or less for the best efficiency.
  • Aerator Type – Opt for aerators that maintain strong water pressure while reducing waste.
  • Material & Durability – Choose faucets made of high-quality materials like brass or stainless steel for longevity.
  • Certification – Look for WaterSense-labeled faucets, which meet EPA standards for water efficiency.

Installing a Low Flow Faucet

Installing a low flow faucet is a straightforward process that many homeowners can handle as a DIY project. However, for the best results, it’s always a good idea to hire a licensed plumber.

  1. Turn off the water supply under the sink.
  2. Remove the old faucet by disconnecting the water lines and unscrewing the fixture.
  3. Install the new faucet, following the manufacturer’s instructions.
  4. Turn the water back on and check for leaks.

If you’re not comfortable handling the installation yourself, hiring a professional plumber ensures the job is done correctly and efficiently.

Plumber installing a low flow faucet

Switching to water saving faucets is a smart investment for any home or business. These faucets help reduce water consumption, lower utility bills, and contribute to a more sustainable future. Whether you’re looking for a low flow bathroom faucet or a kitchen fixture, choosing low flow plumbing fixtures can make a big difference in both your wallet and the environment.

Upgrade to Low Flow Faucets Today with Christianson Air Conditioning & Plumbing

Making the switch to low flow plumbing fixtures is an easy and effective way to conserve water, lower your utility bills, and contribute to a more sustainable future. At Christianson Air Conditioning & Plumbing, we provide professional insights and reliable service for all your plumbing needs. Contact us today to learn more about our plumbing installation and repair services and how we can help you improve your home’s efficiency.

The Ultimate Guide to Controlling Bathroom Humidity

Steaming shower

Bathroom humidity can lead to several issues, from mold growth to structural damage, and can even impact your health. If you’ve ever asked, “Why is my bathroom so humid?” you’re not alone. Many homeowners struggle to manage bathroom moisture, especially in Central Texas, where weather conditions can add to the challenge.

Below we will explore how to reduce humidity in your bathroom effectively and maintain a healthy, comfortable space.

Why Is My Bathroom So Humid?

Bathrooms are naturally humid spaces due to hot showers, baths, and sinks. The combination of warm water and steam creates the perfect environment for excess moisture. However, certain factors can worsen bathroom humidity, including:

  • Poor ventilation
  • Inadequate moisture control features
  • Sealing issues that trap humidity in the room

Why Bathroom Humidity Control Is Important

Controlling bathroom humidity isn’t just about comfort—it’s a matter of safety and longevity for your home. Here’s why bathroom moisture control is critical.

Prevent Mold and Mildew Growth

High humidity levels promote mold and mildew, which can damage your bathroom surfaces and pose health risks.

Protect Walls and Fixtures

Persistent moisture can deteriorate paint, drywall, grout, and even metal fixtures, leading to costly repairs.

Improve Air Quality

Excessive humidity can lower indoor air quality, potentially causing respiratory issues for your family.

How to Get Rid of Moisture in Your Bathroom

White electric bathroom exhaust fan

The good news is that controlling bathroom humidity doesn’t have to be complicated. Here are practical solutions to reduce humidity in your bathroom:

Install a Bathroom Ventilation Fan

A properly sized and maintained exhaust fan is one of the most effective ways to combat humidity in the bathroom. Make sure your fan is powerful enough to handle the size of your space and runs during and after showers.

Open Windows and Doors

If your bathroom has windows, open them during and after using the shower. This allows fresh air to circulate and helps moisture escape.

Use a Dehumidifier

In especially humid climates, a portable dehumidifier can help reduce moisture levels in your bathroom. Choose one that fits the space and has a continuous drain option for convenience.

Fix Plumbing Leaks

Leaking pipes or faucets can add unnecessary moisture to the room. Regular maintenance from a licensed plumbing company like Christianson Air Conditioning & Plumbing can help identify and fix these issues.

Seal Grout and Caulk

Water can seep into cracks in tiles or around the tub, contributing to long-term moisture problems. Regularly sealing grout and caulk ensures water stays where it belongs.

Wipe Down Surfaces

After showers or baths, use a squeegee or towel to dry walls, mirrors, and other surfaces. This simple habit can drastically reduce moisture buildup.

How to Reduce Humidity in Your Bathroom with Long-Term Strategies

For a more permanent solution to humidity in the bathroom, consider these upgrades:

Upgrade to High-Efficiency Fixtures

Water-saving showerheads and faucets not only reduce water usage but also limit the amount of steam produced, helping with bathroom moisture control.

Improve Insulation

Proper insulation helps prevent condensation on walls and ceilings. If your bathroom tends to stay damp, it might be worth upgrading the insulation.

Consider a Humidity-Sensing Fan

Modern exhaust fans equipped with humidity sensors automatically turn on when moisture levels rise, ensuring continuous bathroom humidity control.

Install a Heated Towel Rack

A heated towel rack not only keeps your towels dry and fresh but also reduces moisture in the air.

Signs You Need Professional Help

Plumber working in a bathroom

Sometimes, DIY solutions aren’t enough. If you’ve tried these tips and still struggle with excessive humidity, it may be time to call in professionals. Here are signs you need expert help:

  • Persistent mold growth despite cleaning
  • A musty odor that won’t go away
  • Visible water damage on walls, ceilings, or fixtures
  • An exhaust fan that doesn’t seem effective

At Christianson Air Conditioning & Plumbing, we specialize in diagnosing and resolving bathroom humidity issues. Our team can ensure your plumbing is leak-free, your ventilation system is efficient, and your bathroom stays comfortable and safe.

Contact Christianson Air Conditioning & Plumbing Today!

Don’t let bathroom humidity ruin your home or health. If you’re ready to tackle moisture problems once and for all, the licensed experts at Christianson Air Conditioning & Plumbing are here to help. From fixing leaks to installing ventilation systems, we provide comprehensive solutions for bathroom humidity control in Central Texas.

Call us today or schedule an appointment online to get started. Let us help you create a healthier, more comfortable bathroom for you and your family!

Understanding Yoke Vents in Plumbing Systems

Plumber Inspecting Drains: At a commercial building

When it comes to plumbing systems, proper venting is crucial to maintaining functionality and safety. Among the different types of vents in a drain-waste-vent (DWV) system, the yoke vent often raises questions. Below, we’ll explore what a yoke vent is in plumbing, its importance, its requirements, and how it integrates with the broader plumbing system.

What Is a Yoke Vent in Plumbing?

A yoke vent is a specialized vent pipe used in multi-story buildings to maintain proper air pressure within a DWV system plumbing. Its primary function is to connect a lower-level vent stack to an upper-level vent stack, bypassing the drain lines in between. This setup helps balance the pressure within the system and prevents issues like siphoning water out of traps or impeding wastewater flow.

Without a properly functioning yoke vent, the pressure variations in tall buildings could lead to unpleasant odors, slow drainage, or even system failure. Understanding its role is essential for anyone designing or maintaining multi-story plumbing systems.

Why Yoke Vents Are Important

Man smelling something bad

Plumbing systems rely on a delicate balance of air pressure to ensure smooth operation. When wastewater moves through the drain pipes, it can create negative or positive pressure. Without proper venting, this pressure can cause several problems, such as:

  • Siphoning of Traps: The negative pressure can pull water out of traps, which are essential for preventing sewer gases from entering your home or building.
  • Slow Drainage: Positive pressure can create airlocks, slowing down the flow of wastewater.
  • Odor Issues: Insufficient venting can allow unpleasant smells to escape from the plumbing system.

The yoke vent acts as a stabilizer, equalizing the pressure throughout the DWV system and ensuring optimal performance.

Yoke Vent Requirements

Understanding yoke vent requirements is critical for proper installation. Building codes, like the International Plumbing Code (IPC) or Uniform Plumbing Code (UPC), provide detailed guidelines for vent placement, size, and slope. Here are some general requirements to keep in mind:

  • Size and Slope: The diameter of the yoke vent should match the vent stack it serves. It should also maintain a slope of at least 1/4 inch per foot to ensure any condensation drains back into the system.
  • Location: Yoke vents are typically installed every 10 stories in a high-rise building, depending on the design and local plumbing codes.
  • Materials: The material used for yoke vents should be durable and compatible with the rest of the plumbing system. Common materials include PVC, ABS, or cast iron.
  • Accessibility: The vent should be accessible for inspection and maintenance to ensure long-term functionality.

Always consult local building codes and work with an expert plumbing professional to ensure compliance.

Yoke Vents in Action: The Role in a DWV System

The drain-waste-vent (DWV) system is the backbone of any plumbing infrastructure and is responsible for removing wastewater and venting sewer gases. The yoke vent plays a crucial role in maintaining the system’s efficiency. Here’s how it works:

  • Drainage: Wastewater flows through the drainpipes.
  • Ventilation: Vent stacks release sewer gases and balance air pressure.
  • Pressure Equalization: The yoke vent connects lower and upper vent stacks, preventing pressure imbalances that could disrupt the system.

By bridging the gap between different levels of vent stacks, the yoke vent ensures the entire plumbing system operates smoothly, no matter the building’s height.

Common Issues with Yoke Vents

While yoke vents are designed to be low-maintenance, they can encounter problems over time. Here are some common issues and their solutions:

  • Blockages: Debris or corrosion can block the vent, causing pressure imbalances. Regular inspections can help identify and resolve blockages early.
  • Improper Installation: Incorrect placement or sizing can lead to system inefficiencies. Hiring a licensed plumbing professional ensures proper installation.
  • Material Deterioration: Over time, materials may degrade, especially in older buildings. Upgrading to modern materials can improve performance and durability.

Why You Need Expert Plumbing Assistance

Smiling plumber at work

Installing or repairing a yoke vent requires a deep understanding of yoke vent plumbing and the overall DWV system plumbing. Improper installation can lead to costly repairs, system failures, and code violations. Partnering with an expert plumbing company like Christianson Air Conditioning & Plumbing ensures the job is done right the first time.

Contact Christianson Air Conditioning & Plumbing Today!

Ready to address your plumbing needs? Christianson Air Conditioning & Plumbing is your trusted partner for all plumbing solutions in Central Texas. Whether you need assistance with a yoke vent in plumbing, maintaining your drain-waste-vent system, or tackling any other plumbing challenges, our licensed experts are here to help.

Call us today or schedule an appointment online. Experience reliable, professional, and expert service that gets the job done right!

Top Plumbing Problems in Rental Properties and How to Handle Them

Rental property

Owning a rental property can be a rewarding investment, but it comes with its challenges, especially when it comes to plumbing issues. As a landlord, ensuring the proper functioning of plumbing systems is essential to maintaining tenant satisfaction and protecting your property’s value. Here, we discuss the most common plumbing problems in rental properties and provide guidance on how to handle them effectively.

Clogged Drains

Clogged drains are one of the most common plumbing problems faced by rental property owners. Whether it’s a kitchen sink clogged with grease or a bathroom drain blocked by hair, these issues can lead to water backup and unpleasant odors.

How to Handle It

  • Educate tenants on proper disposal practices, such as avoiding pouring grease down the sink or using drain covers to catch hair.
  • Use a plunger or drain snake for minor clogs.
  • For persistent issues, hire a professional plumber to inspect and clear the drains.

Leaky Faucets and Pipes

Leaky faucets and pipes not only waste water but can also lead to higher water bills and water damage. In rental properties, tenants might not report minor leaks until they become significant problems.

How to Handle It

  • Conduct routine inspections to identify leaks early.
  • Replace worn-out washers, gaskets, or damaged pipe sections promptly.

Running Toilets

Fixing a running toilet

A running toilet can waste gallons of water daily, leading to increased utility bills. Often, the cause is a faulty flapper, fill valve, or other internal components.

How to Handle It

  • Provide tenants with basic troubleshooting tips, such as adjusting the flapper or float.
  • Keep spare parts on hand for simple fixes.
  • Call a plumber for complex repairs or recurring issues.

Low Water Pressure

Low water pressure can frustrate tenants and make daily tasks more difficult. It’s often caused by sediment buildup in pipes, faulty fixtures, or underlying plumbing issues.

How to Handle It

  • Check if the issue is isolated to one fixture or affects the entire property.
  • Clean or replace aerators and showerheads.
  • For persistent low pressure, consult a professional plumber to identify and resolve the underlying problem.

Water Heater Problems

Woman calling a plumber about a broken water heater

Hot water is a necessity, and any issues with the water heater can quickly lead to tenant complaints. Common problems include inadequate hot water, strange noises, or leaks.

How to Handle It

  • Schedule regular water heater maintenance, such as flushing the tank to remove sediment.
  • Check the thermostat settings to ensure optimal temperature.
  • Replace old or faulty water heaters with energy-efficient models when necessary.

Sewer Line Backups

Sewer line backups are serious plumbing issues that can cause significant damage and pose health risks. Tree roots, grease buildup, or collapsed pipes are common culprits.

How to Handle It

  • Install drain strainers to prevent debris from entering the sewer line.
  • Schedule periodic sewer line inspections.
  • For severe backups, hire a professional plumber to perform a camera inspection and necessary repairs.

Dripping or Burst Pipes

Dripping pipes can lead to water damage, mold growth, and higher water bills, while burst pipes can cause severe flooding.

How to Handle It

  • Insulate pipes during colder months to prevent freezing and bursting.
  • Repair or replace damaged pipes promptly.
  • Keep emergency contact information for a professional plumber handy for urgent situations.

Faulty Garbage Disposals

Garbage disposal not working properly

Garbage disposal malfunctions are common in rental properties due to improper use. Tenants might dispose of items like bones, grease, or fibrous foods, which can damage the unit.

How to Handle It

  • Provide tenants with clear guidelines on what can and cannot go into the disposal.
  • Reset the disposal or use an Allen wrench for minor jams.
  • Call a plumber for repairs or replacements if the unit is beyond repair.

Old or Outdated Plumbing Systems

Older rental properties are more likely to experience frequent plumbing issues due to outdated systems. Corroded pipes, worn-out fixtures, and inefficient water heaters can all contribute to ongoing problems.

How to Handle It

  • Invest in modern plumbing upgrades to prevent recurring issues.
  • Replace galvanized pipes with more durable materials like copper or PEX.
  • Schedule regular maintenance to extend the lifespan of existing systems.

Tips for Plumbing Maintenance and Repairs to Rental Properties

Preventative maintenance and prompt repairs are key to avoiding costly plumbing problems. Here are a few tips for landlords.

  • Regular Inspections: Schedule routine plumbing inspections to catch issues early.
  • Tenant Education: Provide tenants with guidelines on how to prevent plumbing problems, such as proper waste disposal and reporting leaks promptly.
  • Emergency Preparedness: Have a trusted professional plumber on call for urgent repairs.
  • Document Maintenance: Keep a record of all plumbing repairs and upgrades to track recurring issues and plan future maintenance.

Why Hire a Professional Plumber?

Professional plumber working on a repair

While some minor plumbing repairs can be handled with DIY methods, more complex issues require the expertise of a professional plumber. A licensed plumber can diagnose problems accurately, provide long-term solutions, and ensure compliance with local regulations.

Professional Plumbing Services With Christianson Air Conditioning & Plumbing

Plumbing problems are inevitable in rental properties, but with proactive maintenance and quick action, you can minimize disruptions and protect your investment. Partnering with an expert plumbing company ensures your property remains in top condition, keeping tenants happy and safeguarding your bottom line.

If you’re dealing with plumbing issues in your rental property, contact Christianson Air Conditioning & Plumbing today for reliable, expert service.

Preparing Your Sump Pump for Fall Rains

Fall leaves and heavy rain

For the fall season, it’s essential to ensure that your home is ready to handle the increased rainfall. One of the most critical components in keeping your basement or crawlspace dry is your sump pump. A properly maintained heavy rain sump pump system can prevent water damage, reduce the risk of flooding, and protect your home’s foundation. Below, we will help you prepare your sump pump for fall rains, so it can efficiently manage excess water and keep your property safe and dry.

What Is a Sump Pump?

A sump pump is a device installed in the lowest part of your basement or crawlspace to prevent water from accumulating and causing water damage. They are typically installed in a sump pit, and when water enters the pit, the pump activates to push the water away from your home through a sump pump discharge line.

Types of Sump Pumps

Understanding the type of sump pump you have is crucial for maintenance and troubleshooting. There are five main types.

Submersible

This type is placed directly in the sump pit and is designed to operate underwater. It’s quieter and ideal for homes with larger basements that experience significant water accumulation.

Pedestal

This type sits above the sump pit, with the motor out of the water. It is more affordable but can be noisier compared to submersible pumps. Pedestal sump pumps are often recommended for smaller sump pits or areas with less frequent water issues.

Battery-Backup

A battery-backup sump pump is a secondary unit that operates when the primary sump pump loses power, such as during a power outage. This type is essential in regions prone to heavy rains and storms, providing peace of mind that your home will stay dry even when the power is out.

Water-Powered

A water-powered sump pump uses water pressure from your home’s plumbing system to operate, making it an excellent backup option. It doesn’t rely on electricity or batteries, which means it can run indefinitely as long as your home’s water supply remains uninterrupted. However, water-powered pumps are not as powerful as battery-backup or primary sump pumps.

Combination

A combination sump pump includes both a primary electric pump and a battery-backup pump in one unit. This setup offers the best of both worlds, ensuring reliable performance under normal conditions and protection during power outages. Combination pumps are ideal for homeowners who want a comprehensive solution for basement flooding prevention.

Choosing the Right Sump Pump for Fall Rains

Brand new sump pumps

For homes that are prone to heavy rainfall during the fall, a combination or a battery-backup sump pump is a wise choice. These units ensure continuous operation during power outages and high water volumes, providing enhanced protection against basement flooding. Additionally, choosing a pump with a vertical float switch will help ensure reliable operation, as these switches are less likely to get stuck compared to other switch types.

Quick Sump Pump Maintenance Checklist

While a sump pump is a reliable tool for keeping your basement dry, regular maintenance is crucial—especially before the rainy season. However, complex maintenance can be tricky for homeowners to handle on their own. That’s why we recommend a professional inspection to ensure everything is in top shape. Here’s a quick list of basic tasks that can help:

  1. Check the Sump Pit for Debris: Look for leaves, dirt, or small objects that could clog your pump. Keep the pit clean and clear.
  2. Test the Sump Pump’s Operation: Pour a bucket of water into the sump pit and watch to see if the pump turns on and off correctly. If it doesn’t, call a professional for a thorough inspection.
  3. Inspect the Discharge Line: Make sure the discharge line is clear of obstructions and directs water away from your home. If you notice a blockage, it’s best to have a plumber check it.
  4. Listen for Unusual Noises: Strange sounds like rattling or grinding could indicate a problem. If your sump pump is making noise after rain, schedule a service appointment to address the issue.

Why Hire a Professional for Maintenance?

Handling a sump pump can be more complicated than it seems. Some components, like the float switch, power source, or internal parts, require professional expertise. A licensed plumber can:

  • Conduct a detailed inspection of your system.
  • Test and repair any issues, such as a sump pump running constantly after heavy rain.
  • Perform maintenance safely and efficiently.
  • Ensure your system is properly sized for your home’s needs.

Preparing Your Sump Pump for Cold Weather

Old sump pump being replaced

As the temperatures drop, it’s important to prepare your cold weather sump pump for freezing conditions. Here are a few tips to keep your sump pump running smoothly in colder weather:

Insulate the Discharge Line

Freezing temperatures can cause the discharge line to freeze, leading to a backup in the sump pit. Insulate the discharge pipe with heat tape or foam insulation to prevent freezing.

Install a Cover

A cover can help prevent cold air from entering the sump pit, reducing the risk of freezing and extending the life of your pump.

Check for Frozen Pipes

Regularly inspect the discharge line and outdoor drainage areas for ice buildup. A frozen pipe can cause your sump pump to work harder, potentially damaging the motor.

Addressing Common Sump Pump Problems

After heavy rain, homeowners may notice certain issues with their sump pump systems. Here’s how to handle some common problems.

Sump Pump Running Constantly After Heavy Rain

If your sump pump is running non-stop, it could be due to a stuck float switch, clogged discharge line, or an improperly sized pump. Contact a professional to diagnose the problem.

Sump Pump Making Noise After Rain

Noises such as grinding, rattling, or thumping could indicate a damaged impeller, loose components, or an obstruction in the discharge line. Turn off the pump and call a plumber for an inspection.

Sump Pump Installation and Replacement

Plumber shaking hands with client

Proper installation is key to ensuring your system runs efficiently and lasts through multiple rainy seasons. If you’re installing a new sump pump or replacing an old one, consider hiring a professional plumber to evaluate your home’s specific needs.

  • Size and Horsepower: Choose a sump pump with sufficient horsepower to handle your home’s water volume, especially if your area is prone to heavy rains.
  • Vertical Float Switch: Opt for a pump with a vertical float switch to reduce the chances of the switch getting stuck.
  • Battery Backup: Consider adding a battery backup system to keep the pump running during power outages.

Contact Us for Professional Sump Pump Maintenance and Installation

If you need assistance with sump pump installation, maintenance, or replacement, Christianson Air Conditioning & Plumbing is here to help. Our experienced professionals will guide you in selecting the right type of sump pump for your home and ensure it’s properly maintained for the rainy season. Call us today to schedule your inspection and safeguard your home from water damage this fall!

The Impact of Hard Water on Your Plumbing System

Hard water mineral buildup inside plumbing pipes

Many homeowners, particularly in Central Texas, struggle with the effects of hard water. This water is packed with minerals such as calcium, magnesium, iron, and copper. While they aren’t dangerous to our health, they can be detrimental to your plumbing system. Below, we’ll examine how hard water can damage your plumbing and appliances, and explore ways to prevent these problems.

What Is Hard Water?

Hard water is water that has a high mineral content. As water flows through soil and rocks, it picks up minerals like calcium and magnesium. These minerals, along with others like iron and copper, dissolve into the water, making it “hard.” The hardness of water can vary depending on the region, with some areas experiencing more significant levels of these minerals than others.

Can Hard Water Cause Plumbing Problems?

Absolutely. Hard water is directly linked to a variety of plumbing problems, including clogged pipes, reduced water pressure, and damage to plumbing fixtures. In severe cases, hard water can even lead to leaks and other issues that require extensive repairs. By understanding the effects of hard water on your plumbing system, you can take proactive steps to protect your home.

How Hard Water Affects Your Plumbing System

One of the primary concerns with hard water is its effect on your plumbing system. The minerals in hard water can cause a variety of issues, from minor annoyances to major plumbing problems.

Mineral Deposits and Blockages

As hard water flows through your plumbing, the dissolved minerals begin to accumulate on the inner surfaces of pipes and fixtures. Over time, these minerals form scale or mineral deposits that can clog pipes and reduce water flow. This buildup can lead to blockages that not only affect water pressure but also restrict the efficiency of your plumbing system.

Damage to Plumbing Fixtures

Hard water doesn’t just stop at clogging pipes, it also causes damage to plumbing fixtures. The calcium and magnesium in hard water can react with soap, creating a scummy residue that clings to sinks, faucets, and showerheads. Over time, this buildup can cause fixtures to corrode and wear out faster, leading to frequent repairs or replacements.

Impact on Larger Appliances in Your Home

Larger appliances such as water heaters, dishwashers, and washing machines are also affected by hard water. The mineral buildup inside water heaters, for example, can lead to reduced efficiency and increased energy consumption. This accumulation of minerals on the heating elements can shorten the life expectancy of the heater, leading to costly repairs. Similarly, dishwashers and washing machines can suffer from decreased performance and require more frequent maintenance due to mineral deposits.

Common Signs of Hard Water Plumbing Problems

Hard water flows from an old tap aerator

Along with a decrease in appliance performance, there are some signs you might notice when hard water starts affecting your plumbing system.

Reduced Water Pressure

One of the most noticeable effects of hard water is reduced water pressure. As mineral deposits accumulate inside pipes, they narrow the diameter, restricting the flow of water. This can lead to lower water pressure throughout your home, making it more difficult to use showers, faucets, and other fixtures effectively.

Potential Plumbing Leaks

Mineral buildup can also contribute to plumbing leaks. As deposits accumulate, they can cause pipes to weaken and develop leaks over time. Leaks can result in water damage, mold growth, and other problems if not addressed promptly.

Dry Skin and Hair

Hard water can leave your skin and hair feeling dry and irritated after bathing, as the minerals strip away natural oils. Over time, this can lead to itchiness and flakiness.

Installing a Hard Water Filter

Plumber inspecting the pipes underneath a sink

The most effective way to combat hard water is by installing a hard water filter. These filters are designed to reduce the mineral content in your water, preventing the buildup of deposits in your pipes and fixtures. Hard water filters can be installed at the main water supply to treat all the water entering your home or at specific points of use, such as under the kitchen sink.

If you suspect hard water is causing problems in your home, consider consulting a professional to assess your water quality and recommend the best course of action.

Protect Your Plumbing System & Schedule a Water Quality Inspection Today

Protect your plumbing system with our comprehensive water quality inspections. Our water softeners remove lime from the water, extending the life of your major appliances and water heaters while eliminating hard water stains and scale from your dishes, sinks, showers, and bathtubs. Contact us today to schedule an inspection and start enjoying the benefits of soft water in your home.

Understanding the Causes of Slab Leaks and How to Prevent Them

Home slab leak

Slab leaks are one of the most serious plumbing issues homeowners can face, as they occur underneath your home’s concrete slab foundation. Left unchecked, a slab leak can cause significant damage to your property, leading to costly repairs. Understanding the causes of slab leaks and how to prevent them is essential for maintaining the integrity of your home’s foundation and avoiding future headaches.

What Is a Slab Leak?

A slab leak occurs when a water pipe beneath your concrete slab foundation begins to leak. These leaks can be tricky to detect since the water is often trapped underneath the foundation, slowly seeping into the soil. Over time, the water pressure and moisture can erode the foundation, leading to structural damage.

Common Causes of Slab Leaks

There are several common causes of slab leaks that homeowners should be aware of.

  1. One of the most common causes of slab leaks is poor installation of pipes beneath the foundation. Substandard materials or improper fitting during the construction phase can create weaknesses in the plumbing system, which may not surface until years later.
  2. The metal pipes under your home can corrode due to chemical reactions between the metal and soil. This corrosion weakens the pipes, eventually leading to leaks. Older homes are particularly vulnerable to this issue since older plumbing systems often lack modern corrosion-resistant materials.
  3. The ground beneath your home is constantly moving due to weather conditions, moisture levels, and natural settling. When the soil expands and contracts, it can place undue pressure on the pipes beneath the slab, causing them to crack or break.
  4. Excessively high water pressure can cause stress on the pipes, leading to ruptures over time. This pressure might come from the municipal water supply or your own water system, and it can create tiny cracks that eventually develop into major slab leaks.
  5. As pipes age, they naturally degrade. Homes with older plumbing systems are at higher risk of experiencing slab leaks due to weakened or deteriorating pipes.

How to Find a Slab Leak

Detecting a slab leak early can save you from significant damage. Here are some signs to look out for:

  • Hot spots on your floor: If a hot water line is leaking, the warm water will heat the concrete, making certain areas of your floor feel warmer.
  • Water pooling or damp spots: Unexplained puddles or damp areas on your floor can be indicators of a water slab leak.
  • Mold or mildew: Excess moisture under your foundation can create a breeding ground for mold, especially in basements or crawl spaces.
  • Cracks in walls or floors: As water accumulates and the foundation weakens, you may notice cracks in your home’s walls or floors.

For effective slab leak detection, a professional plumber will often use specialized tools such as electronic listening devices or pressure sensors to accurately locate the leak.

How to Prevent Slab Leaks

While not all slab leaks can be avoided, there are several preventative measures homeowners

can take to reduce the risk.

Install a Water Pressure Regulator

Installing a water pressure regulator ensures that your home’s plumbing system is not subjected to excessive pressure. Keeping the pressure at safe levels helps prevent pipe failure over time.

Upgrade Aging Plumbing

If your home has an older plumbing system, consider replacing the pipes with more modern, corrosion-resistant materials such as copper or PEX. These materials are less likely to degrade over time, reducing the risk of future leaks.

Regular Plumbing Inspections

Scheduling regular inspections with a licensed plumber can help catch potential problems early. A professional plumber can check for signs of wear and tear, corrosion, and other issues that might lead to slab leaks in the future.

Monitor Water Bills

Keeping a close eye on your water bills can also alert you to hidden leaks. An unexplained increase in water usage may indicate that a leak has formed somewhere in your system, possibly beneath the foundation.

Ensure Proper Drainage Around Your Home

Water pooling around your foundation can accelerate the deterioration of the pipes beneath your home. Make sure your home’s drainage system is functioning properly, and take steps to direct water away from the foundation.

How to Fix a Slab Leak

Plumber meeting with the client

If a slab leak is detected, it’s critical to address the issue as soon as possible. Since slab leaks can cause extensive damage to your home’s foundation, attempting a DIY fix can be risky and lead to more costly repairs down the road.

Consulting a professional plumber is the safest and most effective way to handle a slab leak. A licensed plumber will have the expertise, tools, and experience to accurately diagnose the problem and determine the best course of action, whether it involves rerouting pipes, relining them, or replacing damaged sections. Professionals can also ensure that the repair is done correctly, minimizing further damage and ensuring the long-term safety of your home.

Contact a Professional Today

Don’t let a slab leak compromise your home’s foundation or cause unnecessary stress. If you suspect a slab leak or need slab leak detection and repairs, contact Christianson Air Conditioning & Plumbing. Our team of licensed professionals is ready to provide expert solutions to safeguard your home. Reach out today for reliable, timely service and peace of mind.