Texans serving Texas since 1950

Call Us Now:

Austin Metro (512) 246-5400
San Antonio (210) 651-1212
Temple (254) 773-7175
New Braunfels (830) 627-2211

Have a Clogged Drain? Learn How to Unclog It and When to Call a Professional

Posted on December 24th, 2019 by ChristainSon_Admin

Clogged and slow-draining drains can be an annoyance because water is not going down the drain as it should. When it does finally drain away, it leaves soap, hair, toothpaste, and other unwanted grime. Before you pick up the phone and call a professional plumber, there are a few things you can try at home to see if you can unclog the drain yourself.

Sometimes the problem may not be a clogged drain but, rather, an air problem. There are often air vents on top of plumbing pipes next to your sinks. If the airflow is restricted and cannot move into the pipe as water goes down the drain, it can cause drains to drain slower and appear to be clogged.

Verify there is nothing around the air vent that would prohibit the airflow. If the vent is not blocked, then the problem is probably a clogged drain. Before you run out to your local retailer to by an off-the-shelf clog and drain-cleaning liquid, think again.

Every one of these products contains harsh chemicals that are not good for your home’s plumbing lines. If you ask any professional plumber, they will tell you the same thing: Don’t use store-bought liquid clog and drain cleaners. Besides potentially damaging your pipes, these products also do not address every type of clog.

Instead, you will want to gather up some essential plumbing tools to try to unclog the drain yourself, including:

  • Plunger
  • Rags
  • Plumber’s Wrench
  • Drain Snake
  • Bucket
  • Rubber Gloves
  • Baking Soda
  • Vinegar

Once you have everything you need, you are ready to attempt to remove the clog from the sink.

couple dealing with a blocked sink with a plunger

Step 1: Plunge the Sink

You will want to start by partially filling the sink with hot water if there is no standing water already in the sink. While you are waiting for the sink to fill, take your rag and plug the overflow opening at the top back of the sink.

For kitchen sinks, take the drain stopper and place it over the side you are not plunging. If there is a sink strainer over the drain, remove it before you start plunging.

Hold the plunger over the sink with one hand and, firmly holding the rag or drain stopper with the other, start plunging. You may want to ask someone to hold the rag or drain stopper for you so you can use both hands to plunge.

Start plunging the sink. You want to use quick up-and-down plunging motions to try to force the clog out. Check to see if the clogged drain has been cleared after about six to eight plunges. If not, continue plunging and try again.

Once the clog has been freed, remove the rag or drain stopper. Close the drain on the sink you just unclogged and fill it half-full of hot water, and then open the drain.

The water should drain away as normal. If it doesn’t, there could still be residue left on the pipes, which means the clog will eventually return.

Step 2: Remove the Drain Trap

If you have tried plunging and the clogged drain remains, your next step is to check the drain trap. There could be a big glob of hair, soap scum, grease, and other icky stuff that has blocked the drain.

  1. Place the bucket under the drain trap, which is the “U” shaped pipe under the sink.
  2. If there is standing water in the sink above, it is a good idea to close the drain before removing the drain trap so you don’t have to worry about the excess water overfilling the bucket.
  3. Use the plumber’s wrench to loosen the connectors on both ends of the drain trap.
  4. Unscrew both connectors by hand until the drain trap is no longer connected to the drain pipes. Be prepared for water to drain in the bucket.
  5. Look inside the drain trap. Pull out any hair and other gunk from the drain trap.

hand of plumber holding joints and connections of basin

  1. Go to a sink where you can work, and use a rag to clean inside the pipe. It is safe to use grease-cutting dish soap.
  2. Once the drain trap has been cleaned, reattach it to the bottom of the sink.
  3. Open the drain and see if the water drains away.

If not, try plunging once more. If you still have a clogged drain, the clog is probably farther down the drain line, so you can try the next step before you call your plumber for drain-cleaning service.

Step 3: Run a Drain Snake Down the Drain

Drain snakes come in all different sizes. There are short ones that are only a few feet long for removing hair, soap, and other stuff from tub and shower drains. Then there are longer ones that are 12 to 15 feet or longer, for about $10 for a manual one from your local home improvement store.

You will want to get someone to help you so they can slowly feed the drain snake as you are cranking the handle. You want to slowly crank and feed the snake down the drain line.

Before you get started, it is recommended to remove the drain trap from the bottom of the sink and feed the drain snake into the drain line so you don’t have to worry about trying to get it around the “U” part of the sink drain pipe.

Make sure you have a bucket handy, too, for the gunk and debris that you will be pulling out of the drain. Keep cranking and feeding the drain snake down the pipe. You will be able to tell when you hit curves and elbows.

You will also be able to tell when you hit the clog because it will become much more difficult to crank and feed the drain snake down the drain. At this point, you have a few different options:

  1. Keep cranking as best as you can to get the auger head of the drain snake embedded into the clog. Pull the drain snake back up the drain and remove the gunk in the bucket. Repeat the process until the clog is removed and has been broken up.
  2. Keep cranking until you can feel the clog break up and cranking becomes easier again.

Once the clog has been removed, make sure to run hot water down the drain line to remove any debris that you couldn’t remove with the drain snake.

Plumber cleaning  drain in bathroom with cable

Step 4: Clean the Drain Pipes

Pour ½ cup of baking soda into the drain. Next, pour ½ cup of vinegar down the drain. Quickly close the drain to keep the bubbling from coming up the sink. For bathroom sinks, take a rag and plug up the overflow opening.

Allow the mixture to remain in the drain for about an hour. Open the drain and pour a gallon of hot water down the drain. This eco-friendly chemical reaction is safe for your plumbing lines and helps remove gunk and debris.

Baking soda and vinegar can also be used on clogged drains to help loosen difficult clogs so you can plunge them away.

After trying one or more of the above steps, if the clogged drain remains, it is time to call your local plumber for drain service.

Do I Still Need to Call a Plumber if I Removed the Clog Myself?

Removing the clog yourself is a temporary solution in many cases. Plungers and manual crank drain snakes are not a long-term solution because the clog is likely to redevelop gradually and become a problem again.

The reason for this is that neither tool fully removes all the gunk and debris from inside the drain lines. Even using baking soda and vinegar to clean the pipes won’t get rid of everything.

If the clog keeps returning, and you are getting tired of having to remove it again and again, then you will want to call your plumber for a long-term solution and professional drain-cleaning service.

Your plumber has access to motorized and more powerful drain snakes to clean drain pipes and remove clogs. They also have access to drain cameras, hydro-jetters, and other such equipment that makes pinpointing and removing the clog faster and easier.

For professional drain cleaning and related plumbing and drain services in San Antonio, New Braunfels, Temple, and the Austin Metro Area, please feel free to call Christianson Air Conditioning & Plumbing at 512-246-5400 today!


How to Detect Water Leaks Quickly to Avoid Costly Water Damage

Posted on November 24th, 2019 by ChristainSon_Admin

Finding water leaks in kitchen and bathroom plumbing and having them repaired are essential to avoid costly water damage repairs. There are several different leak tests you can perform yourself before tearing out walls or calling your plumber for assistance.

Most water leaks will occur either in the kitchen or bathroom. However, depending on the age of the home and type of plumbing, some leaks can be more difficult to find if they occur within the walls. Yet, detecting leaking pipes inside walls is also not difficult if you know what to do.

Shower Plumbing Leaks

To inspect and test for shower plumbing leaks, there are several tests you can perform. Start by turning on the shower or tub faucet. Look for leaks around the showerhead where it connects to the plumbing line. Check for leaks coming from around the fixture.

Next, if you have shower doors on your shower or tub, step inside and shut the doors. Pour a small amount of water on the doors, just enough so it runs down. Get out and inspect around the bottom of the door to see if it leaked out. If it did, then the caulking needs to be replaced.

Leakage of water from a shower cabin with glass wall

Plug the drain and fill the shower base or tub with about two inches of water. Take a washable marker and make a line at the top of the water level. Wait for two to three hours and check to see if the water level went down. If it did, there is a leak and the shower pan or tub needs replacing.

You should also look for missing grout and cracked tiles on the walls inside the shower and tub. If you find any, have the cracked tiles and grout replaced so the wall is properly sealed.

Toilet Leaks

It is easy to tell if water is leaking from the toilet tank because there will be water on the floor or the pipe coming from the intake line. The other place to check for leaks is around the base of the toilet if there are water stains you notice. If you have water staining that keeps returning, it means the wax ring or flange needs to be replaced.

Kitchen and Bathroom Sink Leaks

Open up the cabinets and look at the cabinet base for water stains. If you notice any, there is a leak. Check the water supply lines to see if they are wet. Plug the sink and fill it up with some water. Wait to see if it is dripping out and under the cabinet. Take a sponge and squeeze out water around the rim of the sink and around the faucet to check to see if the rim or faucet needs resealing.

Plumbing Pipe Leaks

Man notices the water meter

Look for water stains on the ceiling and walls in your home. Water staining indicates a leak that could be coming from your plumbing pipes or the roof. Normally, if water is leaking from the roof, you might need to contact a roofing contractor and get your roof fixed. However, if your roof is in excellent condition, there could be a possibility that the leak may be due to a malfunction of the plumbing lines in that location. In that case, you will need to narrow it down further using the next test.

Another sure-fire way to tell if you have a leak is making sure all water is shut off in the home. Go read your water meter and write down the numbers. Wait four to six hours and go check the water meter. If it has moved even the slightest, it means there is a plumbing leak.

Once you know you have a water leak, you may need help finding its location. Your plumber has special equipment they can use to pinpoint the leak without having to tear out walls or the ceiling.

For help finding water leaks and leak repairs in San Antonio, New Braunfels, Temple, or the Austin Metro Area, please feel free to contact Christianson Air Conditioning & Plumbing at 512-246-5400 today!

Tags: , ,


Plumbing Repair 101: Why Won’t My Washing Machine Work?

Posted on November 13th, 2019 by ChristainSon_Admin

There are all sorts of reasons your washing machine is not working. To determine the culprit and whether your washing machine needs plumbing repair service, you need to be able to do some basic troubleshooting on your own. Doing some of these tests and checks is not that difficult, and most do not require any tools or having to move the washer!

If you feel these tests and checks are beyond your abilities, don’t worry. Your plumbing repair technician will gladly do them for you when you schedule a washing machine repair service.

Washing Machine Basics

working man plumber repairs  washing machine in laundry

All washing machines, whether you have a top-load, front-load, or a washer and dryer combo, perform the same general wash functions during a wash cycle:

  • Fill with Water
  • Wash
  • Drain
  • Spin
  • Fill with Water
  • Rinse
  • Drain
  • Spin

There may be some other functions like the pre-wash cycle or a soak cycle, depending on the cycle selected. Problems can occur before, during, or after the wash cycle. If you notice a problem, you will want to call and schedule washing machine plumbing services. You should never ignore it, as it can lead to bigger and more costly problems.

The Washing Machine Has No Power

Power problems are easy to troubleshoot. First, check to make sure the washing machine is plugged into the outlet. If it is, unplug it and plug it back in. If there is still no power and you have a GFCI outlet—the one with the built-in breaker switch—make sure the switch does not need resetting.

If there is still no power, go to your breaker box and check the breaker for the washing machine. Even if it is not blown, reset it and then go check to see if the washer has power. If it still doesn’t, then that could mean the power cord is not connected correctly to the machine, the power cord is bad, or there is no power coming from the outlet.

You could plug a radio or other device into the outlet to see if the outlet is working, to help narrow it down further. If the outlet is not working, then call your electrician. If the outlet is working, call your washer and dryer plumbing technician for help.

The Washing Machine Has Power but Doesn’t Fill with Water

There are a few different problems that could cause the washer to not fill with water. Some models require the lid to be closed before the water will start filling. Front-load models will require the door to lock before it will fill with water.

Close the lid or make sure the door is closed tightly. If the washer still won’t fill, you could have a faulty lid switch or door-locking switch that needs to be replaced.

Another reason the washer won’t fill with water is if the water intake lines are kinked or clogged. Check for kinks in the hoses. If there are none, if you are using cold water, try the hot water setting to see if water fills or vice versa. If water fills for hot or cold water, the other line is clogged and the hose needs to be replaced.

  • Washing Machine Supply Hose Tip: Replace your washing machine supply line hoses every five years to avoid them bursting and exploding during a wash cycle and flooding your laundry room.

The Washing Machine Fills with Water and Stops

If the washing machine is filling with water and stops, it could mean several different things. The washing machine’s “brain” could need replacing. The “brain” is the electronic and computer board that tells the washing machine what to do next. If it is damaged, it can prevent the machine from going beyond the fill function.

To determine if it is the “brain” or something else, put the washer on the “Drain and Spin” cycle. If the water pumps out and the washer spins, it means the “brain” is working. Then the problem is something to do with the agitator on the machine.

The belt could also be just loose enough that it is not able to turn the drum because it is too heavy with the clothes and water and needs to be tightened. If the water drains but it does not spin, then the problem could be the washing machine’s motor needs to be replaced or the belt is broken or needs to be tightened.

Female hand wash a pink T-shirt in a basin

The Washing Machine Pumps Water In but Never Fills

This plumbing problem occurs when the drain hose is not installed correctly. The drain hose needs to be above a certain height for water to remain in the machine. If it has come out of the drain trap and is lying on the floor, you will quickly discover that water runs out just as fast as it is pumping into the machine—because your laundry room floor will flood.

The Washing Machine Will Not Drain

If the washing machine fills and washes okay, but it won’t drain, it could be caused by a few different problems. You need to listen to see if you can hear the drain pump kick on or not. If you do not hear the pump turn on, then the drain pump may need replacing.

If the drain pump turns on but water isn’t coming out the drain hose, there is a clog in the drain hose. You will probably want to call your plumber for help, as you will need to get the water out of the machine without making a huge mess.

With top-loading machines, you could get most of it out one bucket at a time. However, with front-loaders, it is more difficult. The water is in the bottom part of the machine. If the drain hose is clogged, you will need to remove the hose and quickly attach another.

If the drain pump is not working, and there is not a clog, you can drain the water. Start by shutting off the washer and unplugging it from the wall. Take the drain hose and lower it to floor level and drain the water into a bucket. Raise the hose back up to stop the water from draining out onto the floor. Repeat this process until all the water is drained out of the machine.

The Washing Machine Drains but Water Is Coming Out the Drain Line

Dirt, debris, hair, and lint all get pumped out of the drain hose and down the drain line. Over time, these things can start to build up inside the drain line and create a drain clog. If water is back-flowing up the drain line and going back into the washing machine or flooding the laundry room, call your plumber for drain cleaning service.

  • Tip to Avoid Clogged Drain Lines: Have your plumber install a filter on the drain hose. The filter will catch those things that clog the drain line.

The Washing Machine Will Not Spin

If all of the other wash cycle functions work, except the spin function, the problem could be caused by a faulty motor. Motors have different speeds that operate the belt and turn the wash drum. During the spin function, the motor runs at a faster speed to turn the drum very fast.

The belt could also be slipping or be loose if the drum turns slowly but never goes into high-speed spinning. Yet another problem is if there is a kink in the drain hose. The kink could prevent all the water from draining out of the washing machine and being left in the clothes.

The Washing Machine Shakes, Rattles, and Rolls

This problem often means the washing machine is not balanced correctly. Take a level and make sure the machine is level from left-to-right and front-to-back. The bubble in the level should be in the middle.

An easy way to check if the machine is not leveled is to see if you can tip it from side to side. If it tilts, it is not balanced. You will need to adjust the feet on the machine to get it balanced unless you have a self-balancing model. Then you just need to lift it up and place it back down on the floor.

Water Is Coming Out the Door During the Wash Cycle

soap coming out from broken washing machine

Another type of washing machine problem you can experience with front-loading machines is water leaking out from around the door during the wash cycle. This problem can occur if the door seal is bad and needs replacing. It can also occur if the door was not shut correctly and part of the seal is kinked or pinched.

Troubleshooting the source of washing machine problems starts by doing some simple tests yourself, which can better help your plumber fix them faster when you call for washing machine plumbing services.

To schedule service on your washing machine in San Antonio, New Braunfels, Temple, and the Austin Metro Area, please feel free to call Christianson Air Conditioning & Plumbing at 512-246-5400 today! We also have 24-hour emergency plumber technicians on call should you have a washing machine or another plumbing repair emergency.


How to Make Sure Your Drinking Water Is Safe

Posted on October 31st, 2019 by ChristainSon_Admin

One thing many people take for granted in the 21st century is safe drinking water. Unfortunately, as events in cities like Flint have shown, that might not always be the case. However, you can take some steps to make sure your water is safe to drink.

The most obvious way to figure out if your drinking water is safe is to look at it. If your water is oddly colored or cloudy, for instance, you might not want to drink it. If you really want to make sure your drinking water is safe, you can also get more in-depth information, such as by sending a sample of your water to a lab to get tested.

If you discover your water isn’t safe to drink, you can take steps to clean it up. These steps can range from something as simple as getting a water filter to something as costly as replacing your old pipes.

Making sure your drinking water is safe can eliminate a major health hazard for not only you but everyone who lives in and visits your house. If you want to find out more about how to make sure your drinking water is safe, read the infographic below.

How to Make Sure Your Drinking Water Is Safe Infographic

Click below to embed this infographic into your website:


Bathroom Plumbing 101: Removing and Preventing Mold & Mildew

Posted on October 25th, 2019 by ChristainSon_Admin

Bathroom shower with mold and mildew

Bathrooms are high-moisture spaces that create the perfect environment for mold and mildew. These fungi can appear in even the cleanest-looking bathrooms, often hiding in the cracks, grout lines, and ceiling corners. Left unchecked, mold and mildew can damage surfaces, produce unpleasant odors, and even pose health risks. Knowing how to effectively remove and prevent these fungi is essential to maintaining a clean, healthy bathroom.

This guide will walk you through everything you need to know about bathroom mold and mildew: what they are, why they appear, and—most importantly—how to remove them and prevent them from returning. With the right techniques, you can keep mold and mildew at bay, protecting your bathroom from unsightly stains and unpleasant odors while ensuring it stays a safe, healthy space for everyone.

Understanding the Differences Between Mold and Mildew

Mold and mildew are both types of fungi, but they differ in appearance and behavior.

Mildew tends to be lighter in color, usually gray, white, or light brown, and has a powdery or fluffy texture. It typically grows on the surface and is easier to remove than mold.

Mold, on the other hand, is darker in color, often appearing black, green, or even blue, and has a more fuzzy or slimy texture. It tends to penetrate deeper into surfaces, especially in porous materials like grout, drywall, and wood.

Common bathroom mold types include Aspergillus, Penicillium, and Stachybotrys (often called “black mold”). Each type of mold has unique characteristics, but all can be problematic if they spread unchecked.

Recognizing the differences between mold and mildew can help you determine the best approach to remove and prevent them.

Why Mold and Mildew Thrive in Bathrooms

Bathrooms are ideal environments for mold and mildew due to:

  • High humidity
  • Frequent water use
  • Warm temperatures

Moisture can linger in the air long after a shower or bath, creating the perfect conditions for fungi to grow. Additionally, bathrooms often have porous materials like grout, tile, and caulking, which can absorb moisture and provide a surface for mold to root into and spread.

Without adequate ventilation, the moisture in bathrooms has nowhere to go, allowing mold and mildew to take hold. Places like the walls, grout lines, under the sink, and even shower curtains are prone to mold and mildew growth if not properly maintained. Mold growing on walls in bathroom spaces is especially common, as these areas can often retain moisture and provide a hospitable environment for mold.

Common Places Mold and Mildew Grow in Bathrooms

Mold in bathroom grout line

Mold and mildew can appear in various places in the bathroom, especially in areas that stay damp or aren’t regularly cleaned. Here are some of the most common areas where mold and mildew thrive:

  • Shower walls and grout lines: Water frequently splashes onto shower walls and grout, creating ideal conditions for mold. Grout is especially porous, allowing mold to establish a deep hold. The constant exposure to moisture, combined with the warmth in the shower, makes these areas prime spots for mold growth.
  • Bathroom ceilings: Mold often forms on ceilings due to rising steam and condensation that accumulate in the warm, moist air. If the bathroom lacks proper ventilation, this moisture has nowhere to escape, creating damp patches on the ceiling where mold can thrive. Regularly checking these areas for discoloration or a musty smell can help you catch mold early and prevent it from spreading further.
  • Under the sink: The area under the bathroom sink is a common hidden spot for mold due to potential leaks, spills, and limited airflow. Moisture buildup in this cabinet space can create an environment where mold under bathroom sink surfaces can spread quickly if left unchecked. Regularly check under the sink for any signs of dampness or discoloration to catch mold early.
  • Around windows: Condensation on windowsills can lead to mildew, especially in colder weather when temperature differences cause water droplets to form. The damp environment around windows provides a good breeding ground for mildew if not kept dry and well-ventilated.
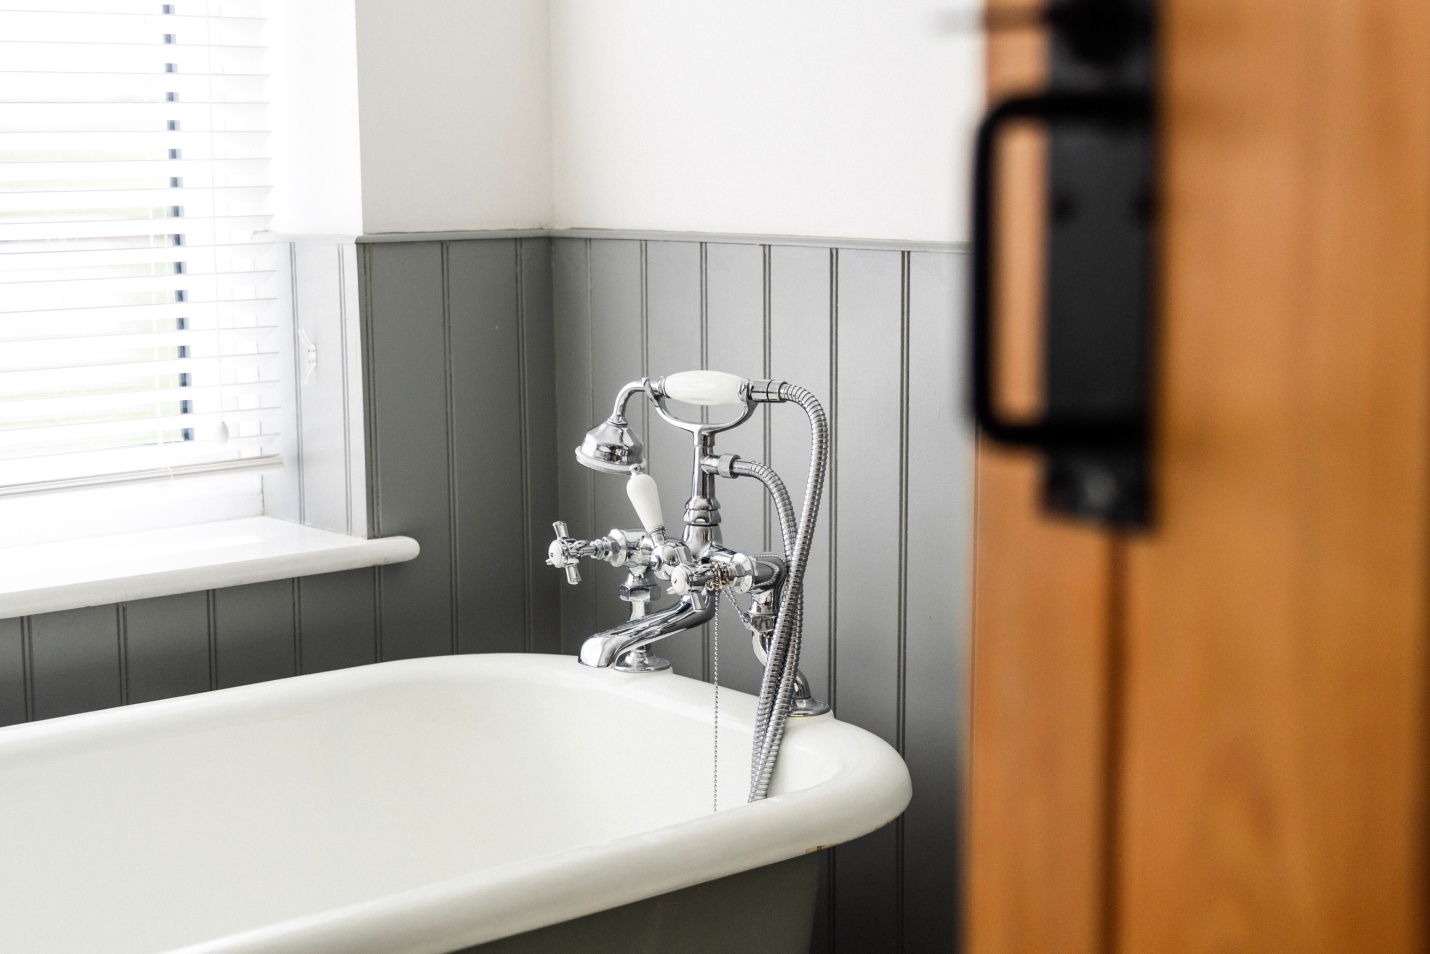
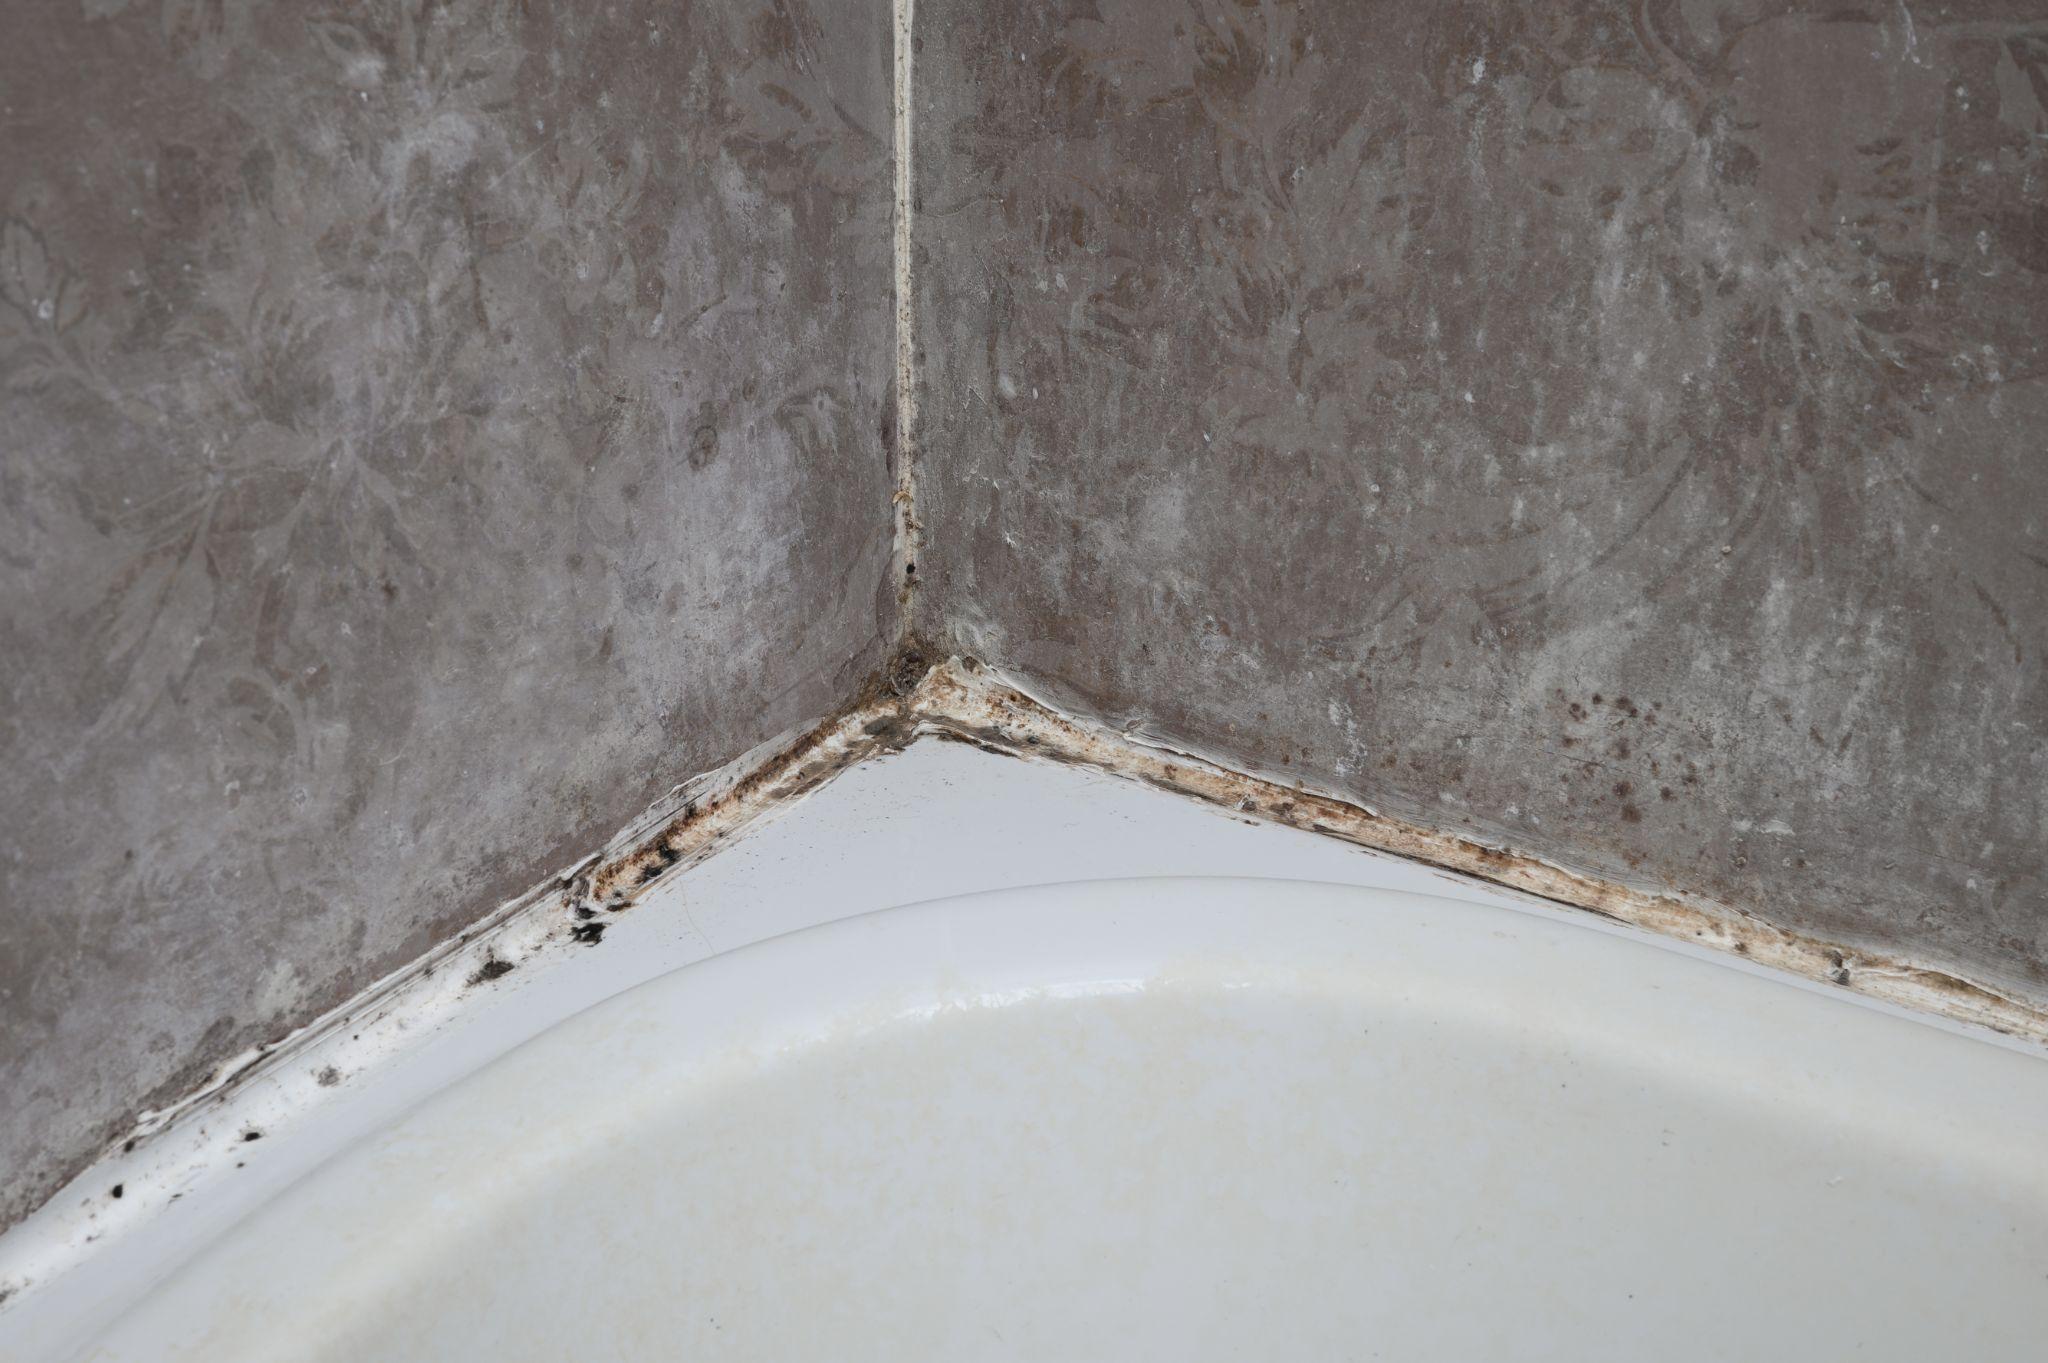
  • Bathtub surfaces and shower curtains: These areas are frequently wet, making them prone to mildew, especially where water collects and dries slowly. Bathtub mildew is common on surfaces that stay damp, particularly along the edges and in corners. Shower curtains, in particular, can trap water and develop mildew if not properly cleaned or dried after use. Regularly washing and drying shower curtains and wiping down bathtubs can help prevent mildew buildup.

Effective Mold and Mildew Removal Methods

Mold and mildew are both common bathroom issues, but they differ in how they should be treated.

Mildew grows mainly on the surface and is relatively easy to clean. You can often remove mildew with a simple solution of vinegar or mild detergent and a soft scrub brush, as it doesn’t penetrate deeply into surfaces.

Mold, however, is more challenging to remove. It tends to grow in dark patches, particularly on porous surfaces. Effective bathroom mold removal requires stronger cleaning agents and a more thorough approach to ensure the spores are eliminated and don’t regrow.

Here’s a step-by-step guide on how to treat mold in bathroom spaces safely and effectively, with a specific focus on mold in common areas like ceilings, walls, grout, and tiles.

How to Remove Bathroom Mold

Cleaning mold in bathroom shower

Before starting, gather your supplies and ensure you have protective gear like gloves, a mask, and safety goggles. Mold spores can be harmful when inhaled, so take precautions.

1: Identify the Mold-Affected Areas

  • Look for mold in common spots such as grout lines, walls, and especially on ceilings where steam and moisture rise, often leading to mold growth.
  • If you’re dealing with mold on the bathroom ceiling, make sure to have a step stool or ladder to safely reach the area and follow the below steps on how to treat mold on bathroom ceilings, walls, and grout lines effectively.

2: Choose Your Cleaning Solution

  • Vinegar: White vinegar is an effective natural mold killer. Spray undiluted vinegar on the affected areas and allow it to sit for 30 minutes to an hour before scrubbing.
  • Hydrogen Peroxide: For tougher mold spots, apply a 3% hydrogen peroxide solution directly to the mold, let it sit for 10 minutes, and scrub thoroughly.
  • Bleach Solution: For heavy-duty mold removal, mix 1 part bleach with 10 parts water. Apply with a sponge or spray bottle and let it sit for a few minutes, then scrub the area carefully.

3: Scrub the Mold

  • Use a stiff scrub brush or an old toothbrush to scrub the mold off thoroughly. Focus especially on grout lines, as mold often penetrates these porous surfaces.
  • For larger areas, a larger brush or sponge may be more effective in removing mold quickly and efficiently.

4: Rinse the Area

  • After scrubbing, rinse the cleaned areas with water to remove any remaining solution. Be sure to wipe down the area to remove any last traces of cleaning agents.

5: Dry Completely

  • Dry the cleaned surfaces with a towel or cloth to ensure that moisture doesn’t linger, as this can encourage mold to regrow.

By following these steps for how to treat mold in bathroom areas, you can effectively eliminate mold from your bathroom. However, if you encounter large areas of mold or recurring issues, it may be best to consult a professional mold removal specialist to ensure all mold is fully removed.

How to Prevent Mildew and Mold in the Bathroom

Preventing mold and mildew in the bathroom starts with creating an environment that reduces excess moisture, improves ventilation, and discourages fungal growth. Here are key strategies for keeping these fungi out of your bathroom:

Improve Ventilation

One of the best ways to prevent mold and mildew in the bathroom is to ensure proper ventilation. After a shower or bath, run the exhaust fan for at least 15-20 minutes to remove moisture from the air. If your bathroom doesn’t have a fan, consider leaving a window open or the door ajar to allow humidity to escape.

Reduce Humidity Levels

Bathrooms are naturally humid, but controlling this moisture is essential to preventing mold. Consider using a small dehumidifier if you live in a humid climate. You can also use moisture-absorbing products, such as silica gel or desiccant packs, in cabinets or drawers to help keep the area dry.

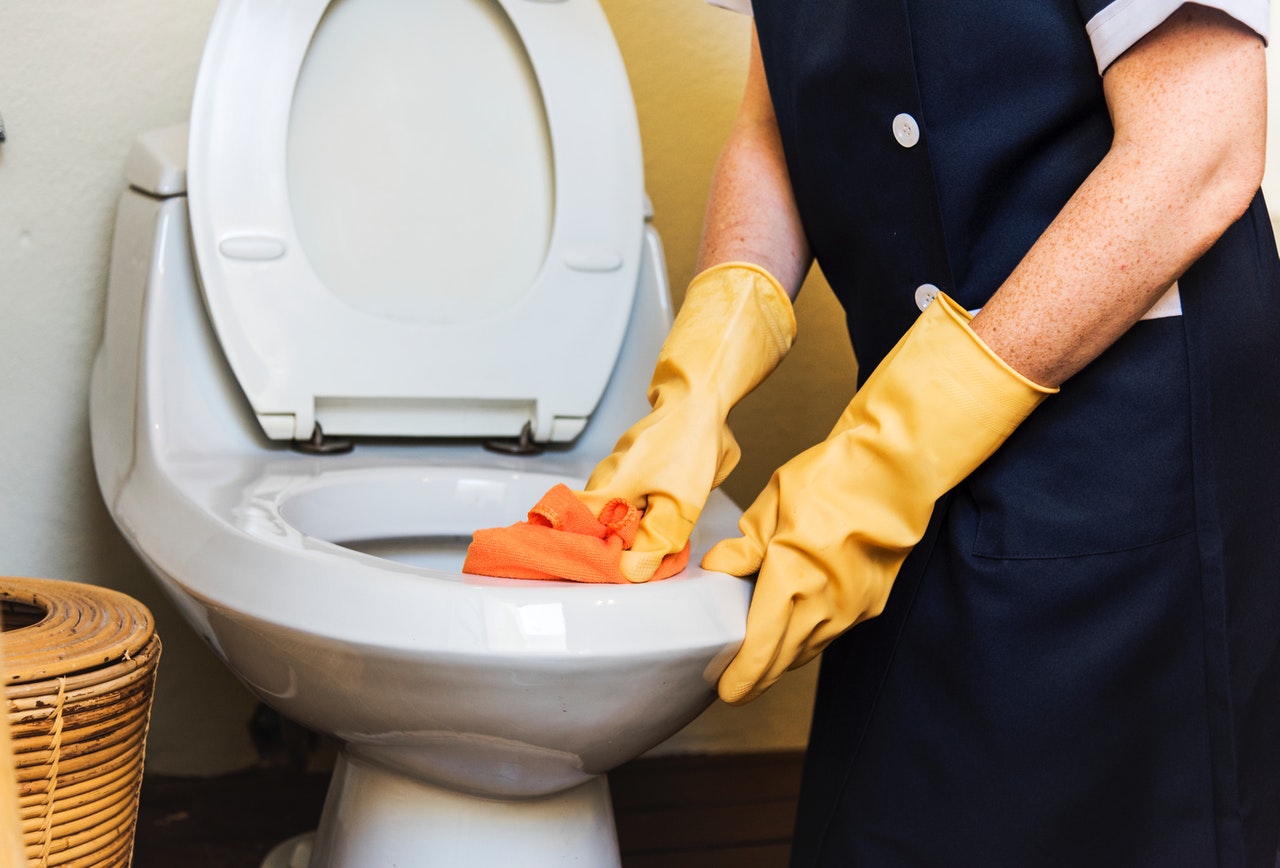
Wipe Down Wet Surfaces

Regularly wiping down wet surfaces is a simple but effective method for how to prevent mold in bathroom spaces. After using the shower, squeegee or wipe down the walls, floors, and glass doors to remove water and reduce dampness.

Regularly Clean Bathroom Walls and Grout

Mold loves to grow on grout and tiled surfaces, so regularly cleaning these areas is essential. Use a mildew-resistant cleaner once a week on shower tiles and grout to help prevent mold in the shower. Mold-resistant sprays or vinegar solutions can also help prevent fungi from taking hold.

Apply Mold-Resistant Paint and Caulk

Applying mold-resistant paint is a great way to limit mold growth, especially on walls that are prone to moisture. When repainting, choose a paint formulated with a mildewcide to help discourage growth. Sealing grout with a waterproof sealant can also prevent water from penetrating and creating a breeding ground for mold. This is especially helpful for how to prevent mold on bathroom walls where water may occasionally splash or condense.

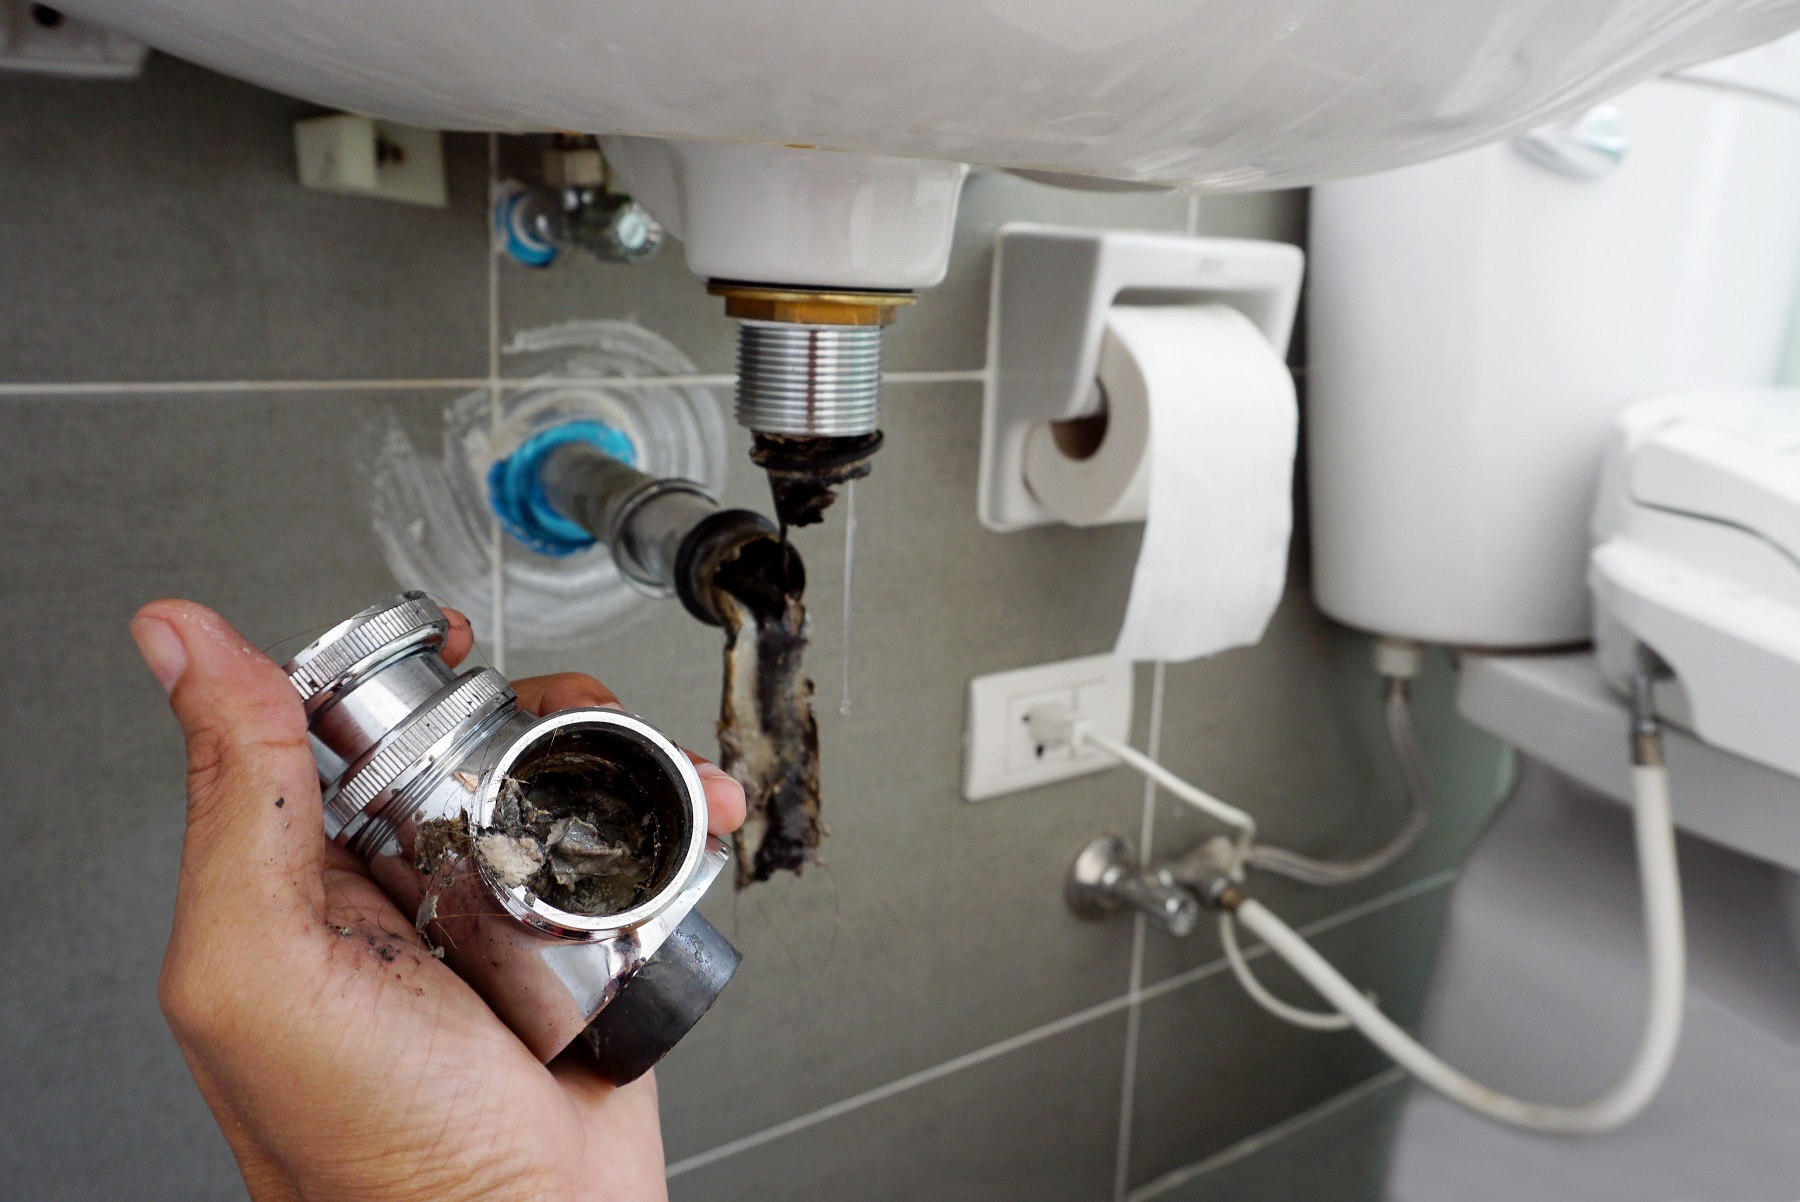
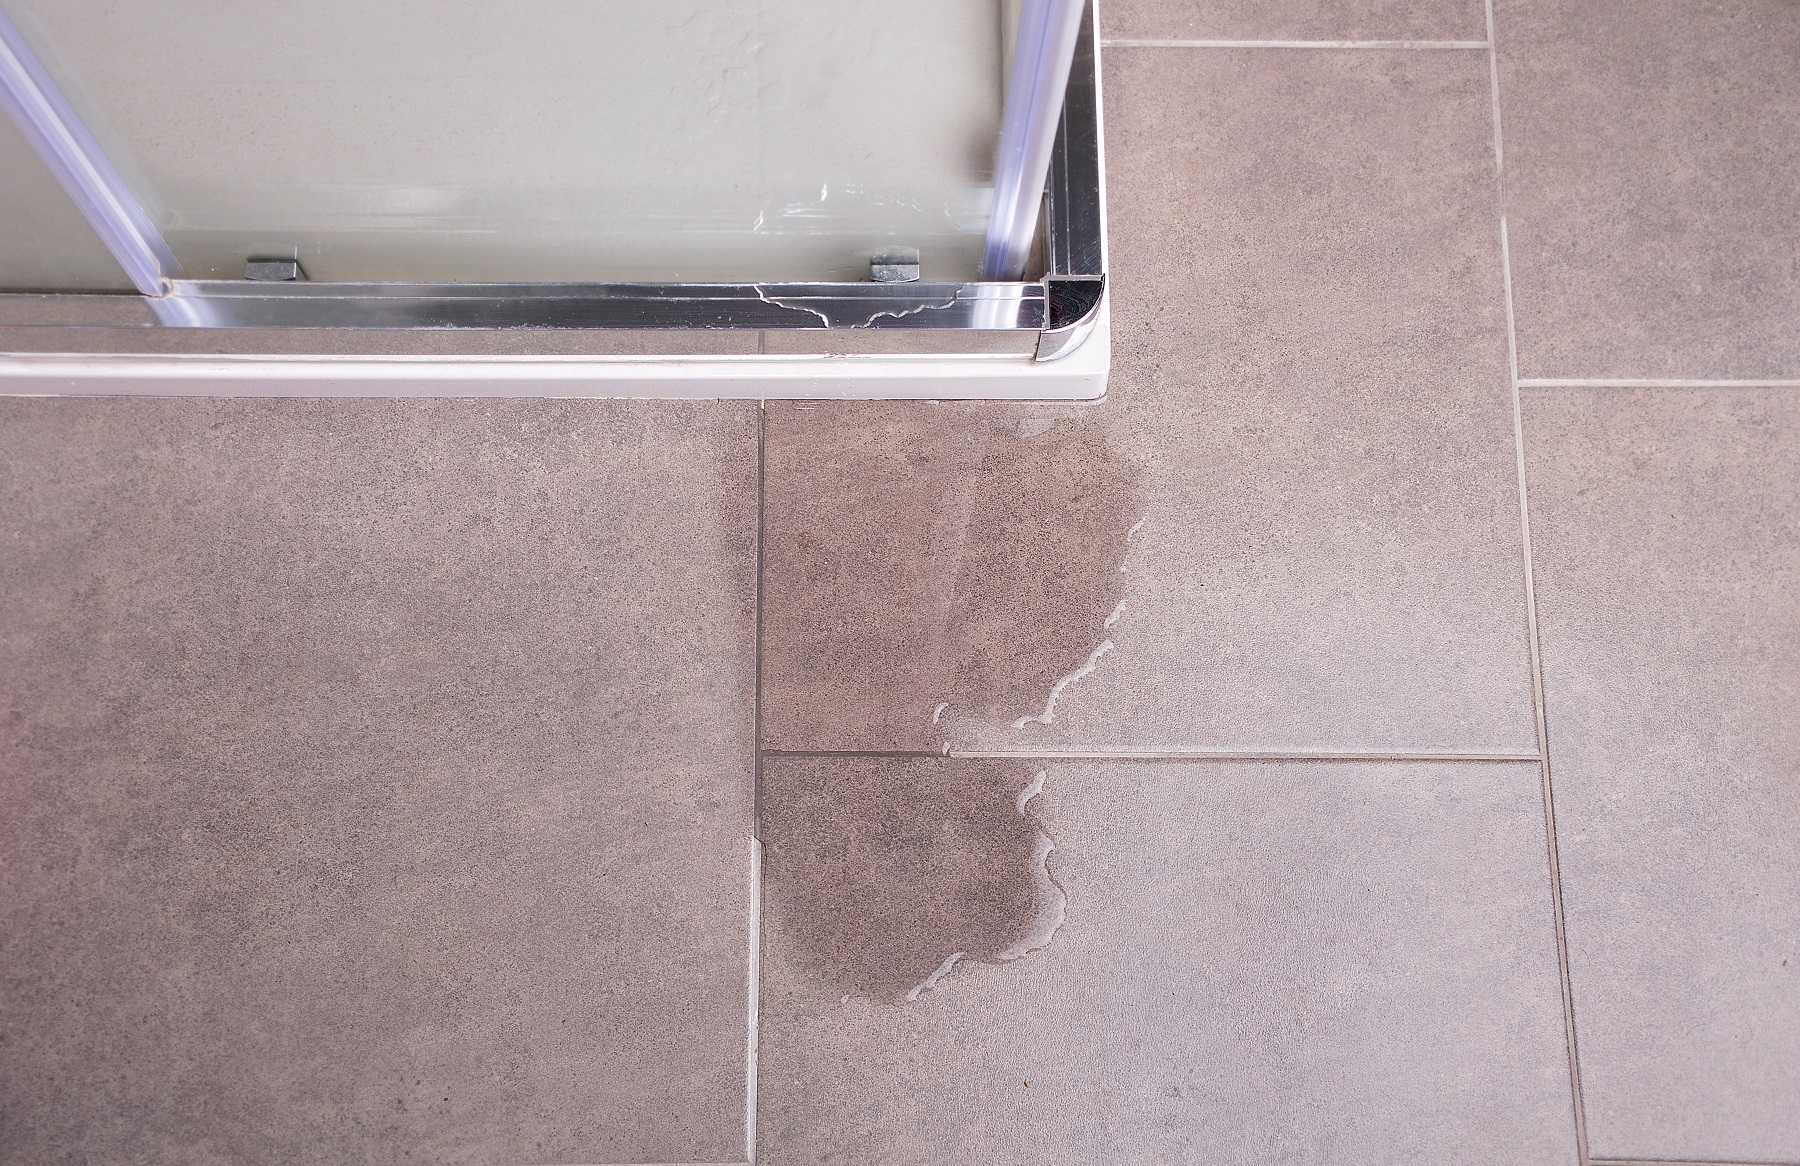
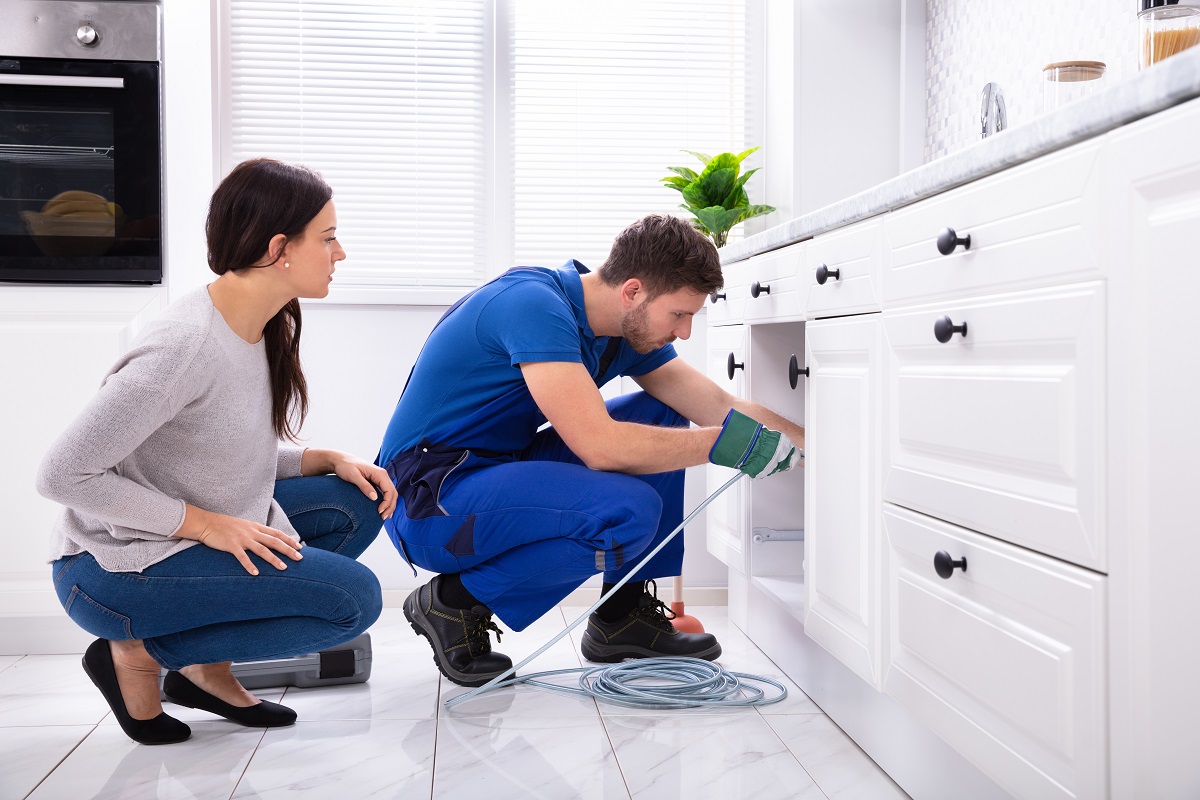
How Plumbing Leaks Lead to Mold and Mildew

Plumbing leak underneath bathroom sink

Plumbing issues are one of the leading hidden causes of mold and mildew in bathrooms. A slow leak, even if it isn’t visible, can create the damp conditions that fungi need to thrive. Addressing plumbing leaks promptly is crucial for bathroom mold prevention and maintaining a mold-free environment.

Water leaks, whether from under the sink, behind the walls, or in the shower, create constant moisture that promotes mold and mildew growth. Even a minor leak can gradually saturate porous materials like drywall, grout, or wood, providing a fertile environment for fungi. Over time, this can lead to visible mold patches, musty odors, and, in severe cases, structural damage to your bathroom.

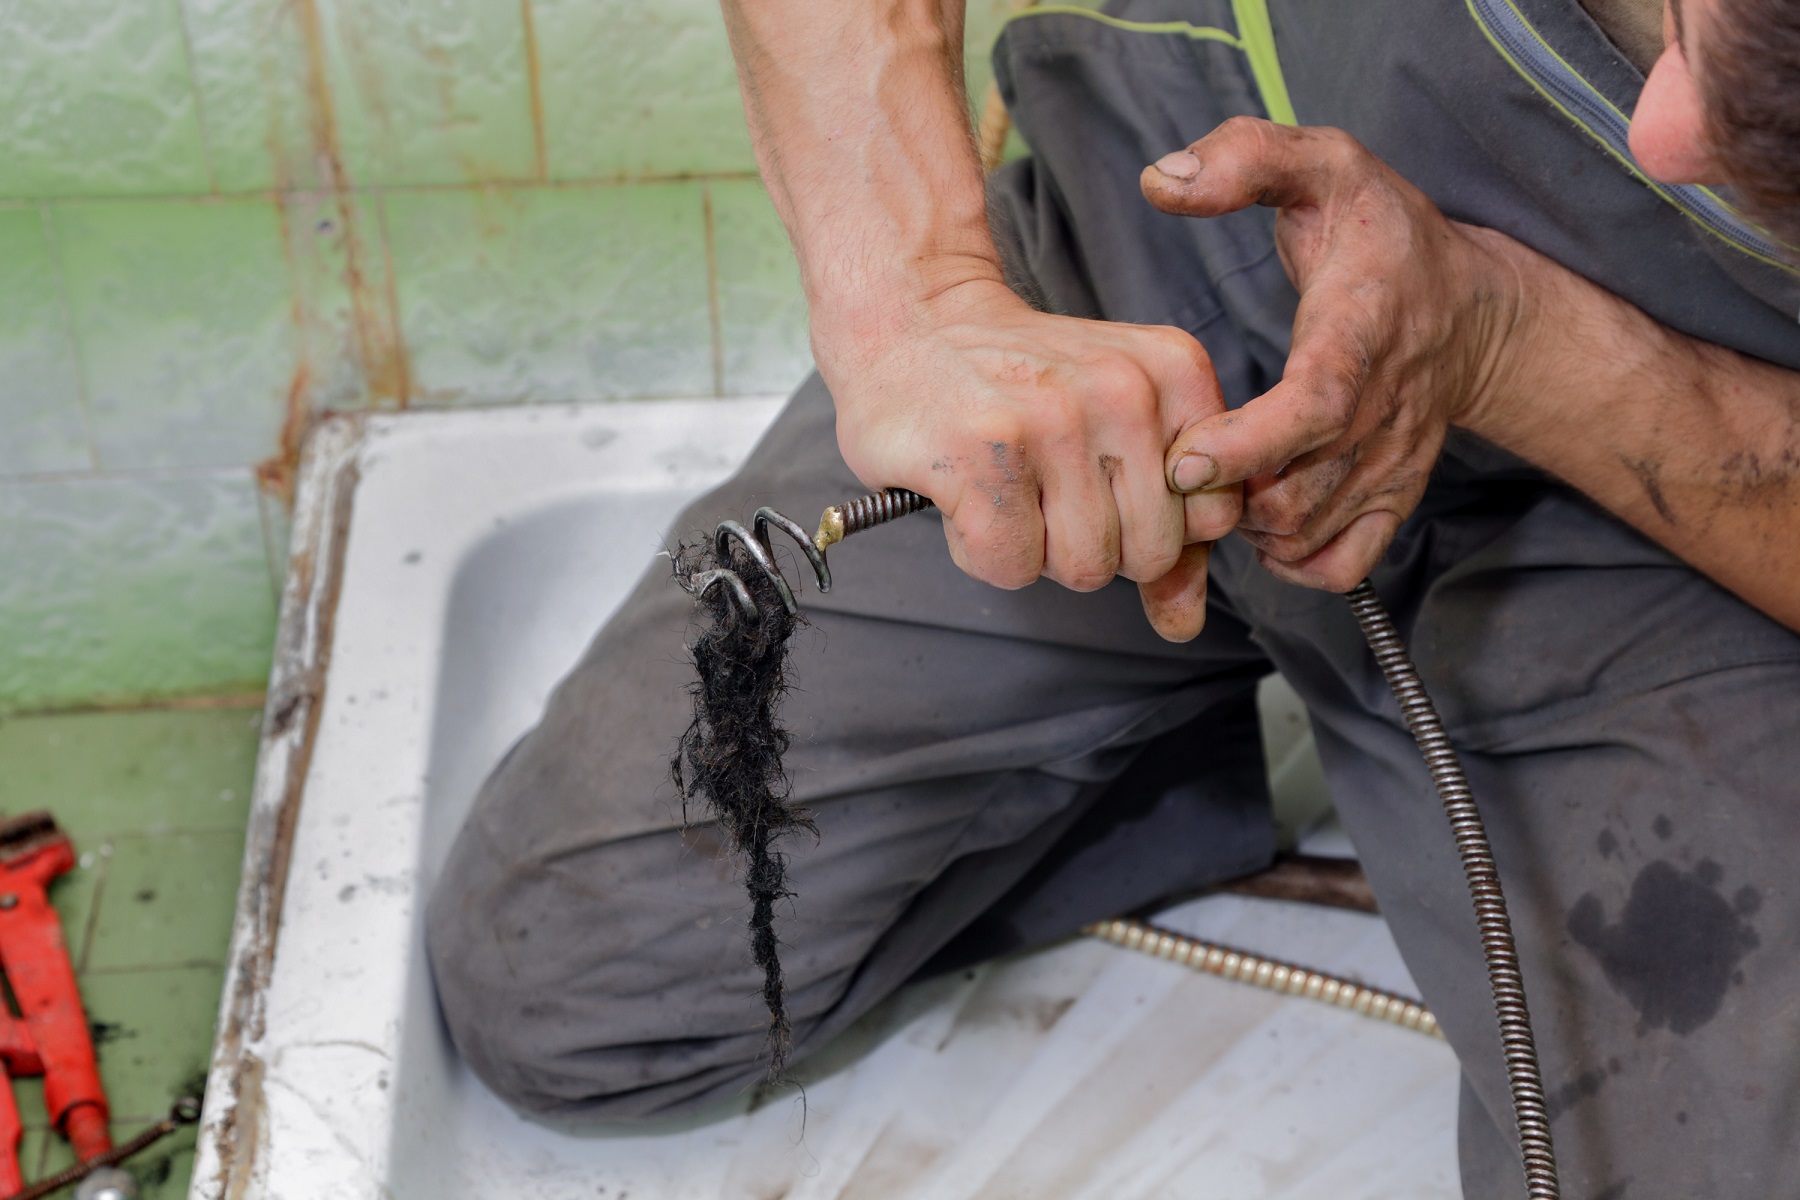
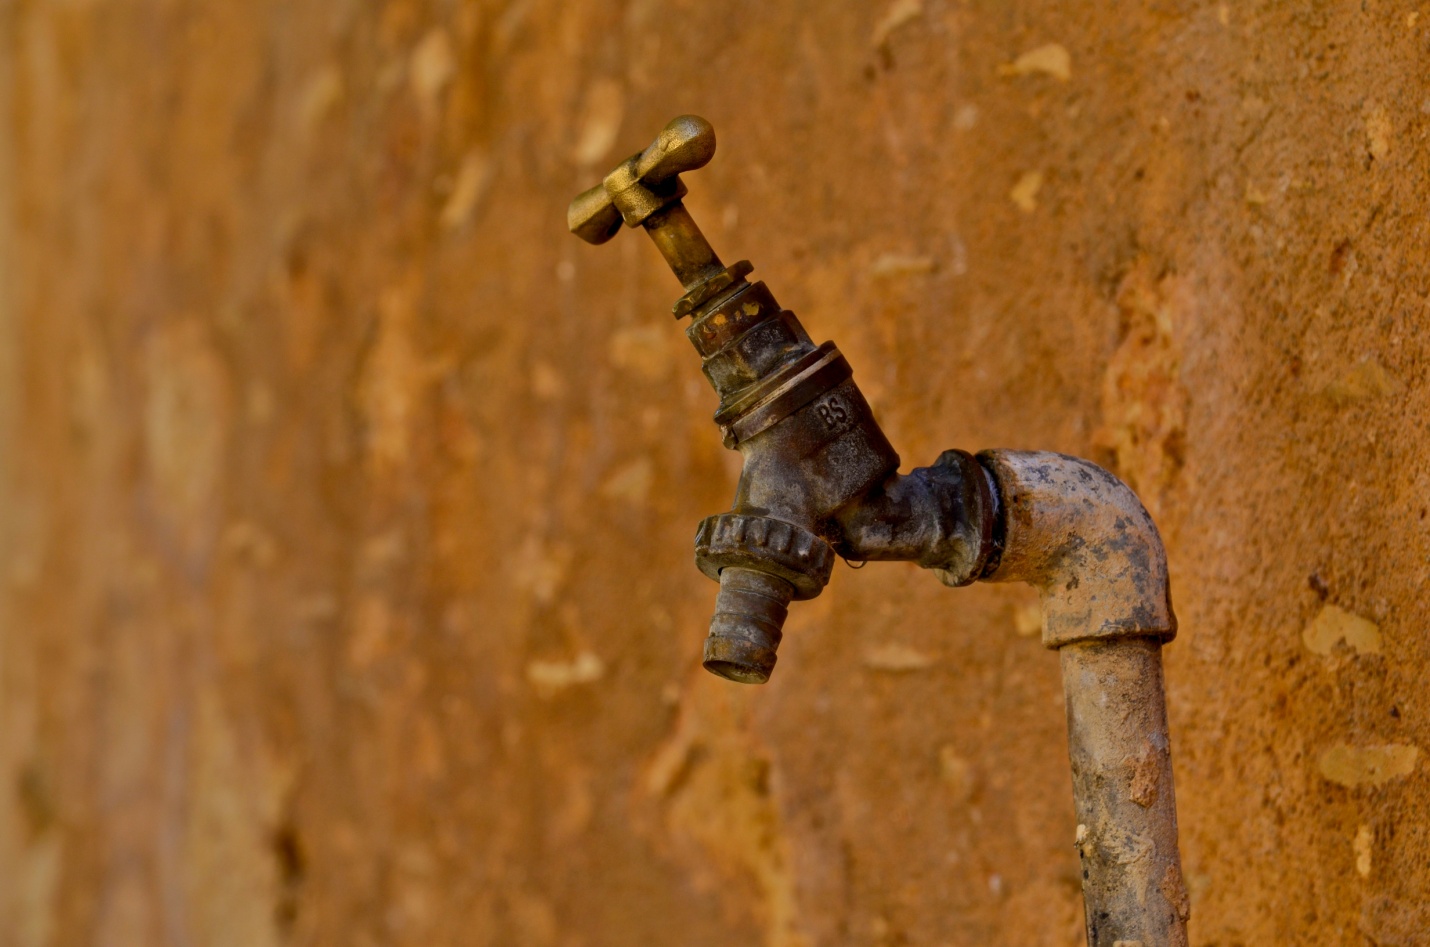
Common sources of leaks in bathrooms include:

  • Leaking pipes under the sink
  • Faulty caulking around the bathtub or shower
  • Seals around the toilet
  • Dripping faucets or showerheads

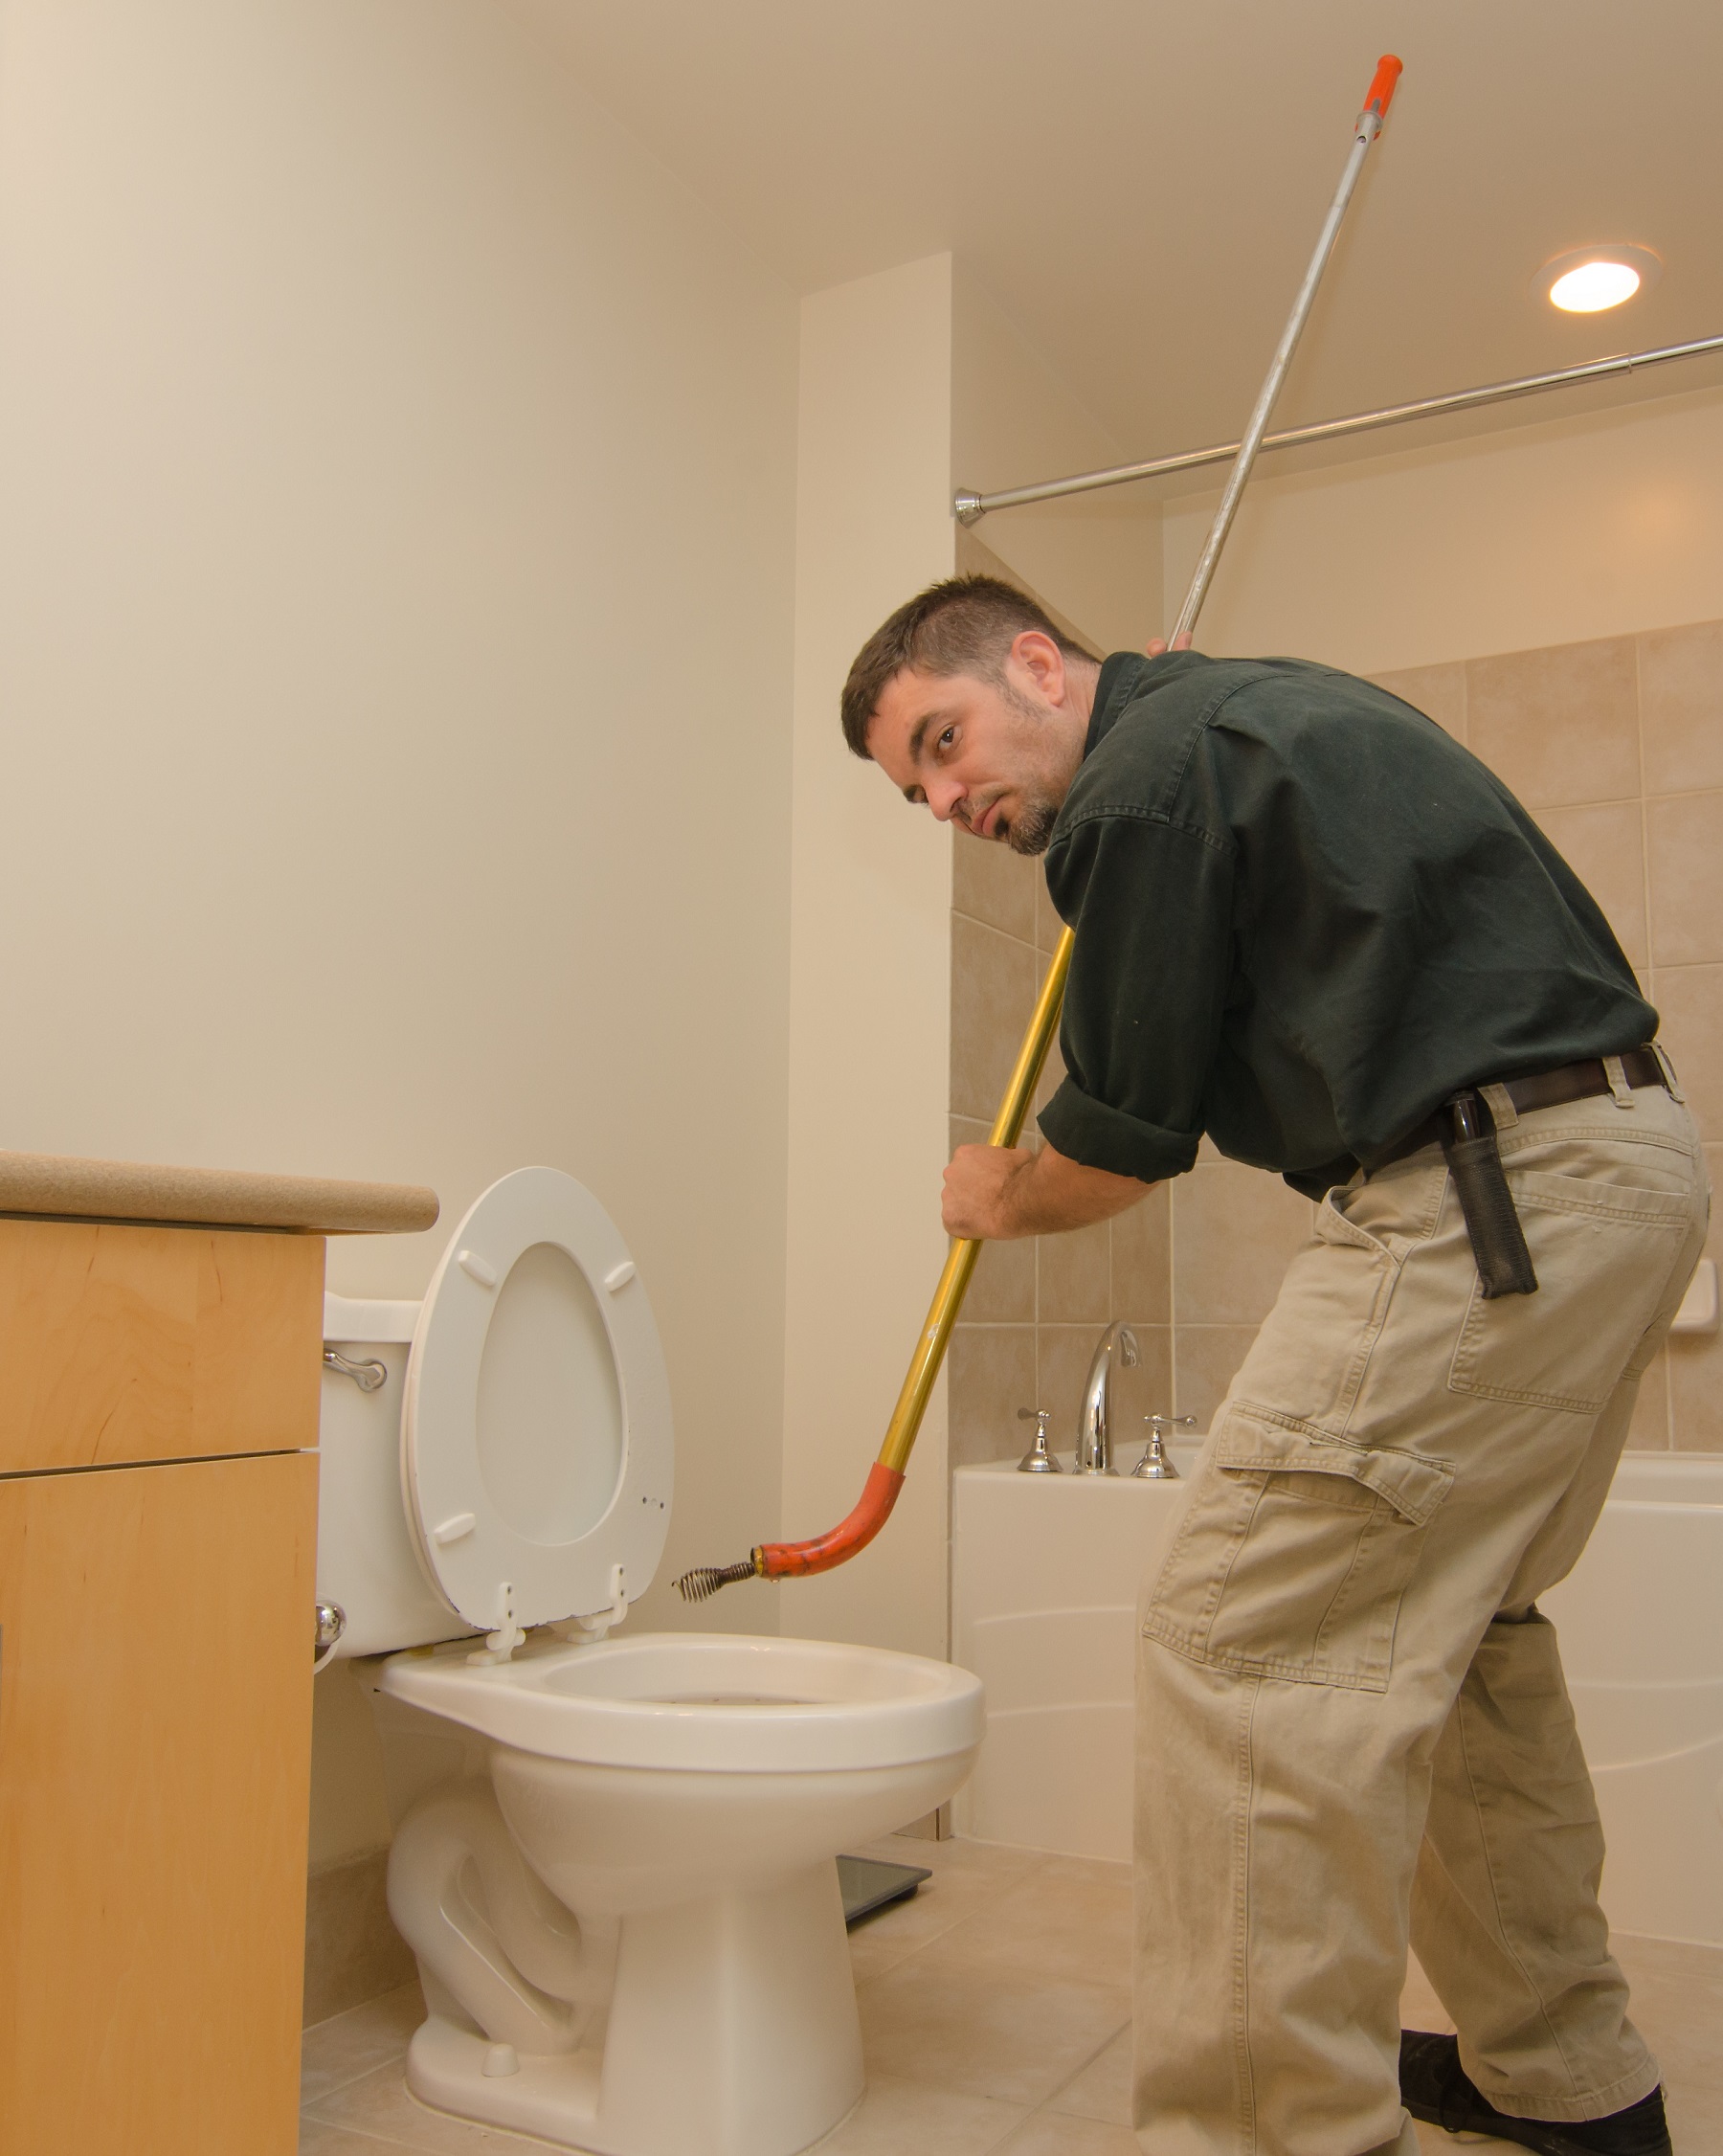
When to Call a Plumber

While some minor leaks can be repaired yourself, significant or hidden leaks often require a professional plumber. If you’re noticing recurring mold, water stains, or persistent dampness despite regular cleaning, it may be time to call a plumber to inspect for hidden issues. A plumber can identify the root cause of the leak and repair it to prevent future mold growth, which is one of the most effective ways for how to avoid mold in bathroom spaces.

In addition to the bathroom, a plumber can inspect other areas of the home prone to leaks, such as the kitchen, water heater, or laundry room.

Promptly addressing plumbing problems can help you protect your home, avoid costly repairs, and significantly reduce the risk of extensive mold damage. If left untreated, leaks can lead to serious mold infestations that are difficult and expensive to remove.

Call Christianson Air Conditioning & Plumbing for All Your Plumbing Needs

Plumber inspecting a bathroom sink leak

If you discover any signs of water leaks, it’s important to resolve them right away to prevent further damage and mold growth. Depending on the age of your home’s plumbing, there may be additional hidden leaks that require attention. Our team can help with a range of services to address leaks and related plumbing issues, including:

  • Pipe repair and replacement
  • Water heater repair and replacement
  • Sink, shower, and bathtub faucet repair and replacement
  • Toilet repair and replacement
  • Water line repair and replacement

If you’re preparing to buy a new home, we also highly recommend scheduling a plumbing inspection to catch any potential leaks or mold and mildew issues before they become serious problems.

For all your plumbing repairs, replacements, and new installations, reach out to your nearest Christianson Air Conditioning & Plumbing location in San Antonio, New Braunfels, Temple, or the Austin Metro Area today!


Kitchen Sink Plumbing 101: Cleaning Your Garbage Disposal

Posted on October 24th, 2019 by ChristainSon_Admin

If you have a garbage disposal as part of your kitchen sink, it is important to clean it to prevent foul odors from stinking up the kitchen. The foul odors come from grease, food particles, and other such things that get stuck to the inside of the garbage disposal and the kitchen sink plumbing.

There are several effective methods for cleaning the disposal to keep odors away and your disposal working great. To clean your disposal, you will want to gather the following cleaning supplies:

  • Grease-Cutting Dish Soap
  • Sponge
  • Vinegar
  • Baking Soda
  • Ice
  • Kosher/Rock Salt
  • Lemons or Limes

Once you have your cleaning supplies ready, the first and most important step is to make sure your disposal is off.

Food waste disposer machine.

WARNING: Before cleaning your disposal, make sure to unplug it from the power outlet or shut off the breaker in your breaker box. Verify the disposal does not have power by turning it on. If you shut it off correctly, it will not turn on.

Step 1: Wash the inside of the disposal.

Wet the sponge in warm water and apply a liberal amount of grease-cutting dish soap. Scrub the inside of the disposal chamber. If you have a dual-sided sink, fill the non-disposal side with warm water to rinse the gunk out of the sponge. Reapply more dish soap if needed and repeat. Allow the dish soap to penetrate and cut through the grease for 5 to 10 minutes. Rinse out the disposal with warm water.

Step 2: De-gunk the hard-to-reach areas of the disposal.

Pour one-half to three-quarters of a cup of baking soda into the disposal. Slowly add an equal amount of vinegar into the disposal. You will hear the two interact and start foaming. Place the sink drain cover over the drain opening.

Allow the fizzing action to work for 15 to 20 minutes. Rinse the disposal out with cold water by allowing it to run down the drain for about 2 to 3 minutes.

Step 3: Remove difficult buildup from the disposal chamber.

Fill the disposal full of ice cubes. Pour in about one cup of kosher or rock salt. Plug the disposal back into the outlet or turn the breaker switch back on. Turn on the cold water so it trickles down the drain and turn on the disposal. The ice and salt “scrub” the inside of the chamber.

Step 4: Freshen up the disposal.

Take your lemons or limes and cut them into quarters. Be sure to remove any seeds and discard them. Drop the citrus pieces down the disposal and turn it on while running cold water down the drain. The oils in the citrus freshen up the disposal and drain and make it pleasant-smelling.

How frequently should I clean my garbage disposal?

It depends on how much you use it. If you use it every day, then you want to clean it every 1 to 2 weeks. If you use it a few times each week, then once a month is sufficient. Part of keeping your disposal clean is also paying attention to what you put in it.

You should never put any of these items into the disposal:

Woman Looking At Male Plumber Cleaning Clogged Sink Pipe

  • Potatoes
  • Potato Peelings
  • Pasta
  • Egg Shells
  • Bones
  • Fruit Seeds and Pits
  • Coffee Grounds
  • Rice
  • Hot Grease
  • Any Non-Food Item

If you have a clogged kitchen sink and disposal, do not use harsh chemical drain cleaners and clog removal products. Try using a plunger and, if that does not work, get help from one of our professional plumbers.

Our plumbing experts can help you with all of your kitchen plumbing maintenance, repairs, and new installations, including garbage disposal replacement. Call your nearest Christianson Air Conditioning & Plumbing location in San Antonio, New Braunfels, Temple, or the Austin Metro Area today!

Tags: , ,


How Do You Remove Hard Water Spots & Lime?

Posted on October 4th, 2019 by ChristainSon_Admin

housekeeper cleaning a hotel room toilet

Unless you’re truly obsessive about cleaning your pipes and fixtures, it’s likely that they’ll start to develop hard water spots, stains, lime deposits, and other signs of wear over time. The good news is that even especially bad cases can be cleaned away with the proper methods.

What Is Hard Water, Anyway?

“Hard” water is a term that refers to water that contains especially high amounts of minerals. Hard water is formed naturally as groundwater moves through various types of mineral deposits, such as limestone and chalk. As a result, the water picks up compounds containing calcium, magnesium, and other elements.

Although hard water is perfectly natural and may even provide valuable minerals through drinking water, it can cause a variety of problems when it’s used in a home or commercial plumbing. In addition to the spots and stains discussed here, hard water can build up in appliances, reduce water heater efficiency, dry out your skin and hair, and exacerbate soap scum.

To combat hard water, many homes and offices have a water softening system. There are various types of water softeners, but most of them use a type of salt to remove the “hard” mineral ions and replace them with “soft” sodium ions. With this exchange, the newly softened water doesn’t leave behind troublesome mineral deposits.

How Hard Water Creates Spots, Stains, and Lime Buildup

When water evaporates, any compounds that cannot evaporate into a gas will be left behind on the surface beneath it. Salt water, for example, will leave a crusty deposit of crystalline salt when it is boiled down. Similarly, water that contains a high mineral content will leave behind a deposit of minerals when it evaporates. If hard water regularly splashes onto your faucet and is left to dry out on its own, your faucet will be left with splotchy mineral spots where the water used to be.

the old brass tap on wall

Hard water stains can also occur in bathroom plumbing fixtures like tubs and toilets when the minerals are deposited at the waterline again and again. This kind of buildup often discolors the area and is much harder to scrape off with normal cleaning methods.

Lime deposits, commonly referred to as “limescale,” tend to be composed mostly of calcium carbonate and can manifest in troublesome ways in water heaters and hot water pipes. As lime builds up in layers inside of pipes, it can restrict water flow in ways that can lead to clogged drainpipes, appliance malfunction, and other issues requiring professional plumbing repair.

Removing Hard Water Spots and Limescale

Because mineral deposits are physically hard and can become quite thick over time, removing them often requires more than just physical effort to break down the structure of the buildup. There is a variety of cleaning chemicals available on the market for hard water stains and lime deposits. If need be, you can also contact companies that offer power washing services in your area to get rid of them.

Vinegar for Surface Spots on Faucets and Hardware

To remove unsightly surface spots and restore the shine of your hardware:

  1. Soak a sufficiently sized rag in undiluted vinegar, and then carefully place it over the faucet, allowing it to cling tightly to the areas covered with hard water spots.
  2. Allow the vinegar rag to sit for 30 minutes to an hour. Over time, the vinegar will break down the tough mineral deposits on the surface of the metal without damaging the fixture itself. Naturally, the worse the buildup is, the longer you’ll want to let it sit.
  3. When enough time has passed, remove the vinegar-soaked rag and begin using a soft sponge to rub away the buildup.
  4. If spots remain, repeat the process until all the deposits have been broken down and removed.

Vinegar Soak for Aerators, Sprayers, and Shower Heads

To improve spray pressure and restore the look of hardware:

  1. Soak the affected parts in a sufficient amount of vinegar for 30 minutes or more (longer for more extensive buildup).
  2. When you feel the vinegar has had enough time to work, use a toothbrush or another small-bristle brush to scrub the head and get into the holes of the hardware.
  3. Rinse and examine the part. If there are still mineral deposits clogging the spray head or staining the outside, place it in a fresh container of vinegar and allow it to soak again.

Vinegar and Baking Soda for Toilet and Tub Stains

metallic chromed tap and the ceramic bathtub

To remove unsightly discoloring stains from bathtubs and toilet bowls:

  1. Add a cup of baking soda to toilet or tub water, followed by 1-2 cups of vinegar. It will fizz up, creating a foam that will sit at the waterline (which should be roughly around the area of the buildup).
  2. Let it sit for 10 minutes, and then swish it around with a toilet brush. Do not flush!
  3. Let it sit for another half hour or so, swishing it around occasionally.
  4. Scrub away any remaining buildup with the toilet brush.
  5. Finally, rinse the toilet bowl by flushing.

Borax Paste for Really Tough Deposits

To combat especially stubborn mineral buildup:

  1. Mix half a cup of borax with a small amount of vinegar to create a thick paste.
  2. Your tub or toilet should be empty of water. For toilets, shut off the water to the fixture and flush to drain the water out of the bowl.
  3. Apply the paste to the hard water stains. You’ll probably want to use gloves or a tool for this.
  4. Let the paste sit on the deposits for approximately 15-20 minutes.
  5. Use a stiff brush (and some elbow grease) to scrub away the stains.
  6. When finished, you can rinse the paste and debris away. For toilets, turn the water back on, allow the bowl to refill, and then flush to rinse.

When Cleaning Isn’t Enough

Sometimes, no matter how much you try to clean them away, the hard water stains and lime deposits just won’t budge to your satisfaction. There are also some places your scrub brush simply can’t reach-like inside your pipes or water heater. When you’re out of DIY options to combat hard water problems, it’s time to turn to the experts at a trusted plumbing company like ours.

Our professional local plumbers have heavy-duty tools and cleaning agents available to them that can help restore your mineral-encrusted fixtures and plumbing. We can also diagnose related plumbing issues, fix or replace any damaged pipes and fixtures, and get you set up with a reliable water softener. By actively softening your water ahead of time, you can prevent the development of hard water and limescale deposits that could cause you serious problems in the future.

We’ll Make Sure Your Plumbing Is as Good as It Looks

At Christianson Air Conditioning & Plumbing, we offer a wide range of plumbing services to home and business owners throughout central Texas. Whether limescale in your appliances is driving up your energy bill or you need emergency assistance for an overflowing toilet, our trained technicians are available to help you 24/7.

To learn more or find out if we can help you with your specific issues, contact us online today! If you need emergency service, call us at the location nearest you.

Austin
(512) 246-5400

San Antonio
(210) 651-1212

Temple
(254) 773-7175

New Braunfels
(830) 627-2211


Why Is My Water Taking So Long to Heat?

Posted on September 24th, 2019 by ChristainSon_Admin

No one wants to wait around for a hot shower, especially when it feels like it’s taking forever to get to the temperature you want. If you’re feeling frustrated by waiting for your morning shower, waiting for your water to heat up to do the dishes, or if you’re ever worried about the water in your laundry not doing what it’s supposed to, it could be time to repair or replace your hot water heater.

shower head in bathroom

Hot water heater problems aren’t uncommon. Some of them can be easily fixed. However, if you’ve had your water heater for a long time, standard plumbing services might not always be the “quick” solution. In some cases, you may need to consider a new water heater installation.

So, what are the signs it might be time for water heater maintenance? When can you tell if it needs to be replaced?

What’s the Hold-Up?

First, it’s important to understand the different possible reasons as to why your hot water heater might be taking so long to heat up your water. There are several possibilities to consider, including:

  • Sediment buildup
  • Distance from the faucet
  • Age of water heater

Obviously, these are very different problems with very different solutions. In the case of sediment buildup, you may be able to get away with a water heater repair/cleaning that allows your heater to last many more years.

However, if you have an old heater than just seems to be failing no matter what, it could be time to replace it.

brown hot water faucet

Replacing a Hot Water Heater

Is replacing your hot water heater an investment? Yes—but it could end up saving you money in different ways. First, if your water heater always seems to be on the fritz, it’s not fair to you to have to call a plumber to your home all the time to fix it. That adds up quickly and may not be a permanent fix.

Older hot water heaters also don’t run as efficiently as newer models. Energy efficiency is extremely important when it comes to appliances nowadays. Thankfully, most hot water heaters manufactured today are far more energy-efficient than the ones built in the past. This will save you money on your utility bills right away.

You can also choose from different options when you’re considering a new hot water heater. For example, if you want your water to get hot as quickly as possible, a tankless water heater might be the best solution for your home.

At Christianson Air Conditioning & Plumbing, we pride ourselves on our years of experience and knowledge in the plumbing industry. Not only can we repair and maintain water heaters, but we can replace them for you. If you aren’t getting the hot water you need throughout your home, feel free to give us a call. One of our experts will be happy to come out and diagnose the problem. You and your family deserve the comfort of hot water, and we can make sure you’ll enjoy it for years to come!

Tags: ,


Water Filtration Options for Your Home

Posted on August 28th, 2019 by ChristainSon_Admin

Do you know what’s in your water? There’s no denying that clean water is essential for the health of you and your family, but the reality is that most people simply don’t know what they’re drinking. The composition and safety of water in America varies significantly from city to city and county to county. Although your water might be technically fit for consumption, it can still include:

  • Bacteria and microorganisms
  • High levels of chlorine
  • Heavy metals
  • Radon
  • Sediment and particulates

… as well as unpleasant tastes and smells.

Since bottled water is expensive, environmentally unfriendly, and highly inconvenient, most people turn to water filtration for a constant supply of safe water. With so many different water filtration options out there, which should you choose for your home?

The answer largely depends on what water additives concern you the most, where your water supply is coming from, where you’d like to put your system, and how much time, money, and effort you’re prepared to spend on maintenance.

This handy guide will give you an overview of the most widely available and trusted options. If you need help to make the right decision for your home, keep reading or call our experts at (512) 246-5400 today!

Water Filtration Options for Your Home Infographic

Click below to embed this infographic into your website:


Six Tips for Plumbing Installation in Your New Home

Posted on August 28th, 2019 by ChristainSon_Admin

If you are building a brand new house or planning a major renovation project for an older home, there are several thinks you need to plan. Firstly, you need to consult a general contractor from companies such as Multi-M Contracting, Inc., and start design and operation discussions with the assigned contractors. Once the operation phase progresses, you need to start thinking about electrical, HVAC and
plumbing installation in the home. The placement of freshwater supply lines, sewer and drain pipes, and plumbing vents should be installed in the right locations with the shortest distances possible. In a new house, plumbing can be done before beginning with interior decor.

If you plan to move to your new house, it can be beneficial if you complete all the plumbing, electrical, and other interior projects before looking for local movers. In this way, you can directly move to the furnished house, which can reduce the stress of relocation to a great extent.

If you have a large home, you may have to consider various plumbing aspects. For one, the farther the water connections are from the main supply line, the lower the pressure can be. Since it can be difficult to know if you will have sufficient water pressure post-construction or post-renovation, it is a good idea to have a water pressure regulator installed at the same time.

The water pressure regulator will allow you to adjust water pressure levels to address any potential issues with low water pressure without having to re-plumb the lines a second time. A word of caution with water pressure regulators: Always have your plumber make adjustments to avoid setting the pressure too high and damaging faucets and water-type appliances.

Plumbing equipment on wooden background.

Aside from having a water pressure regulator installed, here are six more great tips and ideas you will want to incorporate into your new plumbing installation for your home.

1. Include plenty of shut-off valves in the right locations.

Plumbing problems will be the last thing on your mind when installing a new plumbing system in your home. Yet, over time, plumbing problems can and do develop-like water leaks. To make it easier to fix future plumbing problems, you will want to make sure each individual connection has its own shut-off valve.

Shut-off valves will allow you to shut the water off to the affected part of the system without having to shut off the water main. For instance, you will shut off valves under each sink for both the hot and cold water lines. You will also want shut-off valves placed in an easily accessible area for bathtubs, showers, and toilets.

Additionally, when the water company or your plumbing services company is connecting to the water main, make sure you have them install the water main shut-off valve in an accessible location. For example, it is better to place the water main shut-off inside your garage than in the crawl space, where it can be difficult to reach in a plumbing emergency.

2. Think about your present and future plumbing needs.

While you will want plumbing, sewer, and drain lines installed in bathrooms, the kitchen, and the laundry room, there can be other future needs you may be overlooking. Getting in touch with professionals like the ones at Mister Greenway who are experts when it comes to providing home improvement services can be a prudent choice. Along with your plumbing needs, they might be able to advise on other home-related matters. Incorporating the new changes with their guidance can easily save you time and money down the road.

For instance, you will want your plumbing to add water softener plumbing connections even if you do not plan on installing a water softener presently. A good location is in a garage, laundry room or another accessible area that can accommodate a water softener system.

3. Don’t overlook your outdoor plumbing installation needs.

One area of the home many people forget about when designing a new plumbing system for their homes is the outdoors. You will want to have plenty of outdoor plumbing faucet connections around the home. As a minimum recommendation, have one outdoor faucet connection installed on each side of the home.

One other great future plumbing option you might want to have installed now would be the connections for an outdoor kitchen. Down the road, you might decide to enclose your deck or patio and build an outdoor kitchen with a built-in grill.

Lastly, don’t forget about an in-ground pool and in-ground water sprinklers. These things may not be in your current budget, but you never know if down the road you might want them. Your plumber can run connections for the water supply lines now so you will be all set later. One benefit of installing outdoor connections like these is that they can be a selling point in the future, should you decide to move.

4. Decide on what plumbing installation the kitchen will need.

The kitchen is the heart of most people’s homes. You want to have water and drain lines for the kitchen sink, dishwasher, and refrigerator. If your kitchen design includes an island, you may want plumbing lines run now so you could add a sink to the island later if you are not installing one now.

Kitchen designs can impact plumbing and the overall functionality of the kitchen. For instance, some people make the mistake of not designing the cabinets big enough (there are several other common kitchen cabinet mistakes, you can see more here) to fix the water purifier underneath them. Another issue you might find is not placing the dishwasher near the sink. When you install the dishwasher near the sink, the functionality is at stake. However, worry not, if you have a specific kitchen design where the dishwasher is in a location far from a sink, you could certainly have your plumbing services company install separate hot water and drain lines.

5. Decide on what plumbing lines the bathrooms will need.

It is best to evaluate each bathroom individually. While many of your plumbing system needs will be the same, like bathroom sinks and toilets, others can vary. For instance, in the master bathroom, you may want a stand-alone shower and a garden-style Jacuzzi tub. You will also want to think about the number of showerheads you want, as many modern showers have multiple showerheads.

6. Don’t forget about the laundry room.

construction plumber installing bathroom fixtures
Your washer connections need to be in the right location. If you have a front-load washer and dryer setup, the washer door swing is normally to the left and the dryer door swing to the right. As such, you would want the washer connections on the left side of the wall. Some people also run plumbing lines for a laundry room utility sink.

One More Essential Plumbing Installation Consideration

In addition to the six primary areas of the home, there is one more essential plumbing item you will need to decide on: The type of water heater you want in your home. Your available options are choosing between tank-based and tankless water heater installation.

You will want tank-based systems installed in an accessible location that can accommodate the size of the water heater. There should be a drain pan and drain line installed as a safety precaution. You may also need to have the water heater installed near the furnace if you have a water recirculating heating system.

With a tankless water heater installation, you have a bit more flexibility in the placement of the water heater. You could have individual water heaters installed in each area of the home where you need hot water. For example, you could have one heater in each bathroom, another in the kitchen, and another unit in the laundry room.

Construction: Homeowners Excited to Look at Plans

This type of setup is ideal in homes that want tankless heaters and use a lot of hot water. This setup is also great if you want to run multiple hot water lines simultaneously, like running the dishwasher while taking a shower.

There is a third option as well. Some people opt for a tank-based water heater to address most hot water needs in the home, and a stand-alone tankless heater for one specific area of the home. For instance, you may want a stand-alone tankless water heater in the master bathroom for filling up that garden-style Jacuzzi tub for a nice and relaxing soak after a long day at work.

No matter what you decide for your home’s plumbing system design, just remember to make sure you have met all of your plumbing needs. Otherwise, it can be quite costly to have new plumbing lines and drain lines installed later since the lines are no longer easily accessible.

For help with designing the plumbing system for your new home, along with experienced plumbing installation services, please feel free to contact your nearest Christianson Air Conditioning & Plumbing location in San Antonio, Austin Metro, New Braunfels, or Temple today! We can also take care of your central heating and AC installation needs.


Copyright © 2025 Plumbing & Air Conditioning Company - Austin, TX

Licenses M-18631, M-18632, LI15740, TACLA023749C

Regulated by The Texas Department of Licensing and Regulation

P.O. Box 12157, Austin, Texas 78711, 1-800-803-9202, 512-463-6599, Website: http://www.tdlr.texas.gov